Cozy Sweet Potato Peanut Stew with Spinach

A simple, lightly-spiced peanut stew with sweet potatoes, carrots, and spinach. Peanut butter is the magic ingredient which thickens the stew and gives a wonderful savory flavor and rich creamy texture.


1969-12-31 04.00.00 4.jpg

This creamy peanut stew has been featured on my blog before, almost two years ago now, but since then I’ve made it over and over again. Since it has become one of my favorite stew recipes, I decided to dig it out from the dark depths of my oldest blog posts.

There's something really comforting about including peanut butter in a savory recipe. It makes this vegetable-packed soup, actually very filling and satisfying. The savory flavor of the peanut butter goes perfectly with the subtly sweet carrots and sweet potatoes, and tender baby spinach leaves add a splash of color.

1969-12-31 04.00.00 6.jpg

I love white sweet potatoes in this recipe, but orange sweet potatoes will also work quite well.

Sometimes, I like to serve this stew over a bowl of cooked whole grains. I've also served this stew on it's own, and it stands well as its own dish too!

For this recipe, I like to have the main ingredients chopped and measured before starting. Once everything is chopped, you're only about 30 minutes away from a finished meal.

This recipe keeps really well in the fridge for up to 5 days, so double the ingredients if you want to enjoy it all week! 

1969-12-31 04.00.00 5.jpg

Check out the video below to see it all come together!


Tofu Scramble Breakfast Sandwich with Melty Vegan Cheddar Cheese

This vegan breakfast sandwich is a classic comfort food which features a savory tofu scramble and a homemade cashew “cheddar” cheese spread. This melty, stretchy cheese spread also makes the perfect vegan grilled cheese!

sandwich2 (1).jpg

Sometimes, you just need a savory breakfast that’s a little extra indulgent and comforting, and this breakfast sandwich will definitely hit the spot. When I went vegan, I thought I’d never get to enjoy anything like a breakfast sandwich ever again, but over time I learned that it’s possible to make a vegan substitute for just about anything, including the classic egg and cheddar filled sandwich.

Many years ago when I was living in NYC, I needed a cheap breakfast which could keep me full all day through my busy schedule. Once I discovered there were bodegas on every corner serving up egg and cheese sandwiches, breakfast sandwiches became my everyday meal.

These days, since becoming vegan and more health-conscious, I tend to stick to oatmeal topped with nuts or seeds and fresh fruit. While this is great most of the time, I still occasionally have days where all I want is something as filling and satisfying as a classic breakfast sandwich. Since it was not specifically the greasy eggs and cheese that I missed, I knew I could make a vegan version which had a similar texture and flavor that would make for an equally delicious sandwich.

sandwich1 (2).jpg

Tofu scramble doesn’t need to be complicated. I’ve tried many scramble recipes which include chopped onions, garlic, peppers, mushrooms, and all sorts of add-ins, and while those scrambles make for great meals on their own, for this sandwich recipe I like to use a simplified version which is more versatile like classic scrambled eggs.

Here’s what you’ll need to make a basic tofu scramble:

  • firm tofu

  • nutritional yeast

  • smoked paprika

  • onion powder

  • garlic powder

  • mustard powder, or yellow mustard

  • turmeric

  • cumin

  • black pepper

  • salt, or use kala namak black salt for more of an eggy flavor

I like to mix all the spices together in a bowl and then add in a splash of water to make a spice paste. Pouring over the spices in the form of a paste allows for the spices to marinate the tofu in the pan rather than just cling to the outside of the tofu. Once you have your spice paste mixed, it takes just 5-7 minutes to brown the crumbled tofu in a pan, then add in the paste and cook for a few more minutes. This scramble recipe is so quick and easy!

cheddar12.jpg

When I’d order my breakfast sandwiches at my local bodega, I’d always specifically ask for cheddar cheese. I loved the sharp tangy flavor on a breakfast sandwich, and to me any vegan version would be incomplete without a realistic cheddar substitute. While I normally avoid nut-heavy vegan cheese replacements, a vegetable-based sauce would just not cut it here for a cheddar cheese replacement. I’ve found that cashews are the way to go for the best spreadable, melty, homemade vegan cheese.

This cheddar cheese spread is perfect for grilled cheese sandwiches too! It can also be thinned out and made into a mac and cheese sauce (it reminded me so much of Velveeta!) but I still prefer my cheesy vegetable-based sauces more for pasta. If you are looking for a spreadable vegan cheddar that you can make at home, this is the perfect recipe!

How to make melty vegan cheddar cheese:

You will need:

  • cashews

  • water

  • tapioca starch

  • nutritional yeast

  • lemon juice

  • salt

  • white miso paste

  • paprika

  • maple syrup

  • onion powder

  • garlic powder

  • turmeric

Soak your cashews first if not using a high-speed blender. Then add all of the cheese ingredients into a blender and blend until completely smooth. Pour this mixture into a pan over medium heat and stir for a few minutes until it thickens. Scoop this mixture into a jar or other sealed container and store in the fridge until ready to use. This will keep for 7-10 days.

You can warm it up before using it or just spread it on the sandwich as is, since the warm scramble and toasted bread will heat it up. No matter the temperature, the texture will stay quite thick and melty, very similar to actual melted cheddar cheese.

If giving up cheese is the one thing holding you back from trying out a plant-based diet, definitely give this vegan cheese recipe a try!

sandwich3 (2).jpg

While you could pile this sandwich high with toppings such as mushroom bacon, sliced avocado, tomato, onions, or spinach, you could also just stick to the classic “egg and cheese on a roll.” Serve it on a biscuit, english muffin, whole grain bread, or even throw it all in a wrap for something different. Both the scramble recipe and the vegan cheddar recipe are so versatile and can be used to make a variety of other meals as well, so make a large batch and have a fun week of cheesy sandwiches!

To see the whole process, check out my recipe video:

For a super-easy version, check out the recipe notes for an alternative recipe which uses slices of marinated tofu instead of tofu scramble. It’s also a bit less messy and easier to take on the go. I make that version more often than the scramble, but both are so good.

I hope you love this vegan breakfast sandwich!


Italian Antipasti Marinated Mushrooms

These marinated mushrooms are perfect for adding to salads or served as part of an Antipasto plate. Small white button mushrooms are boiled in a vinegar mixture along with garlic, herbs, and diced pimentos. Then, the cooked mushrooms are stored in the brine which helps to preserve them. Because this recipe is oil-free, the mushrooms will actually keep for longer, up to 2 weeks in the fridge!

mush1.jpg

A couple weeks ago, I found myself at the Antipasto salad bar at the grocery store, checking out all the pickled foods and olives when I came across some seriously delicious looking marinated mushrooms. I picked some up and definitely enjoyed them, but they were covered in oil, and that just didn’t seem necessary. It didn’t really add anything to the flavor and if anything it made them a bit slimy.

So I decided to try and make my own version, completely free of oil, but still just as flavor-packed and tangy. It turns out, the oil really doesn’t serve any purpose at all. In fact, not using any oil means that these will keep for much longer because the acidity of the vinegar works to preserve the mushrooms and garlic.

mush3.jpg

You can add these to salads and wraps, or even slice them and add them to sandwiches. For the most part though, we like to snack on them when browsing the fridge.

If you ever find yourself with too many mushrooms and need a fast way to preserve them, this is the perfect recipe for that situation. The ingredients are minimal and simple, and you can change it up by adding in which ever herbs you prefer.

mush2.jpg

For storing these mushrooms, you can use any sealed container or jar you like, but storing them in glass is ideal. I think it’s best to just repurpose old leftover jars of sauce or other leftover jars, but if you’re into fancy Italian glassware, I love my Bormioli Rocco Fido jars (affiliate link). They have lasted me years and not only do they look beautiful, they also hold up to the dishwasher and even have survived being dropped.

To watch the whole simple cooking process, check out my recipe video. Note: I don’t have a small deep pot that works with my induction burner which I use to film recipes, so I opted for a sauce pan, but boiling these in a small deep pot would be best and requires much less frequent stirring over the course of the cooking time.

I hope you enjoy this tasty mushroom recipe!


Notice: This blog post contains affiliate links, which simply means that I earn a commission if you purchase through those links, but your price remains the same. Thank you for your continued support! 

Pasta e Fagioli- Pasta, White Bean & Vegetable Soup [Vegan, Oil-free & Gluten-free]

Warm up this winter with this comforting, veggie-packed. pasta & white bean soup. Based on a traditional Italian peasant dish, Pasta e fagioli is a healthy and budget-friendly recipe. Top with vegan parmesan and fresh herbs such as rosemary and basil.

2019-01-09 05.55.52 1 (1).jpg

Happy 2019! After a long break over the holidays, I’m back with more healthy vegan recipes to share.

This winter, I’ve been making a lot variations on bean soups, but this pasta & bean soup might just be my new favorite. It’s a simple recipe made with some fresh veggies and herbs, fire roasted tomatoes, cannellini beans, and small-shaped pasta.

It’s a versatile recipe that works well with many different herbs, fresh and dried. I prefer using fresh herbs, but don’t always have them on hand so I’ve listed options for both. Rosemary, basil, and marjoram are my preferred herbs in this soup recipe, but other herbs like oregano, sage, and thyme would also work well.

I also added in some extra vegetables to make this soup even healthier, but they aren’t totally necessary so feel free to omit the carrots or spinach if needed.

2019-01-09 05.54.11 1 (1).jpg

Here’s the recipe for this simple 2-ingredient vegan cashew parmesan. It is the perfect savory topping for this soup!

I hope you enjoy this deliciously healthy soup recipe! Check out the video I made below to see the whole process and if you try out this recipe, let me know how it goes!


Creamy Double Pumpkin Alfredo Sauce (nut-free, dairy-free & oil-free)

Enjoy all of the pumpkin with this creamy, vegan-cheesy, double pumpkin cream sauce. Pumpkin seed cream and pureed pumpkin are blended together with savory onions, garlic, nutritional yeast, and sage to make a deliciously creamy, autumnal pasta sauce.

pmk3.jpg

Pumpkin seed cream + pumpkin puree = pure creamy double pumpkin bliss.

When fall began this year, I set out to create a uniquely creamy pumpkin sauce recipe using all different parts of the pumpkin. I’ve seen other vegan pumpkin alfredo sauce recipes which use pumpkin puree along with cashews or coconut milk to make it creamy, but I had never come across a recipe using pumpkin seeds to make the cream before, so I started experimenting.

To make this super easy to throw together, I used canned pumpkin puree and raw shelled pumpkin seeds. If you wanted, you could roast a whole pumpkin to make your own pumpkin puree and then individually remove the shells off each pumpkin seed until you completely lose your mind, but I don’t recommend going that route if at all possible. This time of the year, grocery stores tend to make the canned pumpkin puree easier to find, so take advantage of that and save yourself from a potential pumpkin-induced breakdown.

The pumpkin taste in this sauce is very subtle and the flavor that comes through the most is a rich cheesy flavor from the nutritional yeast and the miso paste. If you want to taste more of the pumpkin, you can reduce the amount nutritional yeast, but I prefer the cheesier version.

pmk1.jpg

Here’s what you’ll need:

  • 1/2 cup raw hulled pumpkin seeds or pepitas

  • 1 1/2 cups water

  • 1/2 cup yellow onion or shallot, diced

  • 4 garlic cloves, minced

  • 1 tsp fresh sage, minced, or 1/4 tsp dried

  • 1 cup pureed pumpkin, canned will work well

  • 1/2 cup nutritional yeast, or less if desired

  • 3/4 - 1 tsp salt, or to taste

  • 1/2 tsp white pepper

  • 1 tsp white miso, optional

First, make the pumpkin seed cream by blending the pumpkin seeds with water until completely smooth. If you have a high speed blender there’s no need to soak the seeds, but if you have a regular blender, soak the pumpkin seeds overnight first to soften them. Once blended, set the blender with the pumpkin seed cream aside for a moment.

Next, sauté the chopped onions and garlic for about 7 minutes until browned. Stir in the sage, pumpkin puree, nutritional yeast, pumpkin seed cream, salt, and pepper. Simmer over medium low heat for another 5 minutes while slowly stirring everything together. Remove from the heat and allow to cool for a moment before pouring the contents of the pan back into the same blender. Add in a teaspoon of white miso paste (optional) and blend the sauce together until it is totally creamy and smooth, then pour over prepared pasta of choice. This makes about 27 oz of pasta sauce, or enough for 4-6 bowls of pasta. I keep mine in a jar in the fridge and use it all week.

I used whole wheat linguine, but you can use gluten-free noodles or any kind or shape pasta you’d like. It makes a great fall version of vegan mac and cheese as well!

pmk2.jpg

This pumpkin alfredo sauce is a crowd-pleasing recipe that’s easy to make and perfect for pumpkin season. The pumpkin seed cream is a pale green color which makes the color of this sauce a bright almost lime-tinted yellow that is so vibrant and unique. I hope you enjoy this fall recipe as much as I do.

If you love creamy vegan-cheesy sauces, check out some of my other recipes-

Leave a comment below if you try this out, I’d love to hear what you think of it!


3-Ingredient Date Caramel Sauce

This creamy date caramel sauce is made with just dates, plant-based milk, and a tiny pinch of salt. A pourable sauce to drizzle all over apples, oatmeal, cinnamon rolls, or add to any autumnal dessert.

date1.jpg

Apple season is upon us and there’s no better way to enjoy apples than sprinkled with cinnamon and dipped in date caramel sauce.

This caramel sauce is silky smooth, not sticky or chewy like traditional caramel, so it’s much easier on your teeth, and with no added sugar, it’s a healthier alternative too.

The best part is that you can make this with only three ingredients:

Dates, vanilla plant-based milk, and a tiny pinch of salt (optional). That’s it!

For a pourable sauce, use 1 cup of plant milk, or for a thicker caramel use 1/2 cup. I prefer the thinner sauce because it’s easier to drizzle it all over everything, and that’s mainly how I like to use it.

date2.jpg

Here are few of the ways I’ve been using this date caramel sauce:

  • as a dip for sliced apples and pears

  • on top of oatmeal, baked oatmeal bars, or in overnight oats

  • drizzled all over homemade cinnamon rolls or apple pie

  • blended with apples to make a caramel apple smoothie

  • add some to granola

  • swirl into the batter of your next cinnamon loaf or cake

  • stir into your morning coffee or tea for a refined sugar-free sweetener

  • blend with frozen bananas and apples to make caramel apple nice cream

This recipe makes about 12 oz of sauce. This will keep fresh for up to 10 days in a sealed jar in the fridge.

If you try this out, let me know what you use it on and leave a comment below!


Potato & Black Bean Enchiladas with Avocado Tomatillo Sauce

Flavorful spiced potatoes and black beans are rolled up in whole grain tortillas and topped with a zesty roasted tomatillo and avocado sauce, then baked until heated through. Top with fresh chopped cilantro and a squeeze of lime.

2018-09-22 05.56.21 1.jpg

When tomatillos started showing up in our weekly CSA produce box, I began experimenting with making my own enchilada sauce from scratch. Tomatillos are quite tangy so I roasted them and blended them up with some avocado which adds the perfect creamy balance, as well as flavorful additions like roasted garlic and onions, jalapeños, fresh cilantro, and of course lots of lime juice.

enchilada1.jpg

For the filling, I boiled some diced yellow potatoes until just fork tender, then I sautéd them with onions, garlic, savory-smoky spices and black beans.

The whole grain tortillas I had on hand were a bit large, so I was only able to fit four into my baking dish and that worked just fine- though I did have to use two utensils to serve it! Smaller tortillas will be easier to serve, but either size will work. Gluten-free tortillas will work well too.

This is best served fresh but it will keep pretty well covered in the fridge for a couple of days, though leftovers never seem to stick around very long!

enchillada2.jpg

To watch the whole process, check out my latest recipe video.

If you try this recipe, let me know what you think of it in the comments!


Lemon Potato Orzo Soup [full recipe + video]

Warming turmeric and zesty lemon make this potato orzo soup extra healthy and immune-boosting. It's the perfect cozy soup to have any time of the year. 

2018-08-14 09.01.17 1.jpg

Yes, it is still summer and it's definitely still hot where I am, but that doesn't stop me from enjoying a delicious bowl of soup! Lately, I've been craving a hearty potato soup full of orzo pasta and fresh tangy lemon juice, so despite the heat I decided to go for it and spend a just few minutes by the stove top to make that happen. 

This is a variation on a tofu no-chicken noodle soup recipe I made a few months ago, but instead of tofu I used cubed yellow potatoes, and instead of noodles I used orzo pasta. I also added some ground ginger and a teaspoon of turmeric which tastes wonderful with potatoes and makes this soup extra healthy. It's a simple but flavorful recipe made with some of my favorite herbs and a squeeze of lemon juice. 

I'm finally getting back to making recipe videos again! Let me know what you think of the video in the comments- do you like seeing the recipe in the form of a video, or do you just prefer a written recipe with photos?

For now, I intend to keep the videos short and simple, but eventually I want to make longer videos for our YouTube channel as well.

My plan is to start making recipe videos for each recipe from now on, as well as going back and making videos for some of my favorite older recipes, which I'm super excited about because making videos and the process of putting them together is actually so much fun.

2018-08-14 09.05.36 1.jpg

This soup is absolutely worth turning on your stove top for, even in the summer!

If you make this lemony potato & orzo soup, let me know what you think of it.


How to Make Oil-free Vegan Mushroom "Bacon"

Crispy, savory, vegan mushroom bacon. Made on the stove top with a simple, oil-free marinade of tamari, maple syrup, and balsamic vinegar. 


m2.jpg

Okay, so I guess everyone can stop eating bacon from pigs now... right?

I mean seriously, look at those mushrooms, it doesn't get any meatier than that. The marinade is just the right amount of smoky and salty with a hint of maple syrup to caramelize the mushrooms. The chewy texture of these large king oyster mushrooms makes them an even more realistic vegan bacon-replacement. 


Choosing your 'shrooms

The best "bacon" mushrooms are going to be the larger ones like king oyster mushrooms, also called king trumpet mushrooms (shown below), as well as portobello mushrooms. Both kinds will work well for this recipe, but I prefer king oyster mushrooms when I can find them.

m3.jpg

How to perfectly slice king oyster mushrooms using a mandoline

King oyster mushrooms are best sliced on a mandoline using a serrated slicing blade. This will give them the perfect looking texture for this recipe as well as ensure that the mushrooms are an even thickness which will help them to cook evenly. Aim for anywhere from 1/16th--1/8th of an inch in thickness. 

The mandoline I use and love is the Oxo Good Grips Mandoline (affiliate link), just make sure to always use the food holder or a cut proof glove when working with the mandoline.

King Oyster mushrooms sliced on a serrated mandoline blade

King Oyster mushrooms sliced on a serrated mandoline blade

How to slice portobello mushrooms with a knife

For portobello mushrooms, while you could slice them on a mandolin, I prefer to thinly slice them using a knife. Make sure your knife is freshly sharpened- it's especially important when slicing softer produce. 

Remove the portobello mushroom stem, then place your mushroom gills side up and carefully slice into long slices which are roughly 1/16th-1/8th in thickness, as evenly as possible. 

Portobello mushrooms thinly sliced with a sharp knife

Portobello mushrooms thinly sliced with a sharp knife


How to pan fry mushrooms without oil

  1. First, mix together all of the marinade ingredients (2 tbsp tamari, 1 tbsp balsamic vinegar, 1 tbsp maple syrup, and 1/2 tsp liquid smoke) in a small bowl. Place your sliced mushrooms (8 oz.) in a large bowl, then pour over the marinade. Toss a few times to fully coat each mushroom, then let them sit in the marinade for 10-15 minutes.

  2. Heat a nonstick skillet over medium heat, then once warm add a portion of the marinated mushrooms to the dry pan, placing as many as you can flat in the pan without layering or crowding them. You may need to do this in batches. Leave the marinade in the bowl for later use in the recipe.

  3. Let the mushrooms cook, undisturbed, for about a minute or until the bottom of the mushrooms turns golden brown. You may need to turn the heat down to medium/low or low if your pan starts smoking, but keep the pan pretty warm. Using tongs, flip the mushrooms back and forth every minute or two until each side is lightly charred and crispy. This could take anywhere from 5-8 minutes. Remove mushrooms from pan and set aside.

  4. Add your next batch of mushrooms to the pan in a single layer and again let them sit for the first minute until the bottoms turn golden, then flip them every couple of minutes until each side is light brown and slightly charred. This will take less time than the previous batch because the pan will be hotter, about 3-5 minutes.

  5. Once all batches have finished cooking, add the mushrooms you cooked in the previous batch(es) back to the pan and pour over the marinade. Turn the heat to low and cook for another 3 minutes or until the marinade has boiled away and the mushrooms are crispy on the edges but still have a nice sheen, then remove from pan and serve over rice or in any recipe where a bacon alternative is called for such as- sandwiches, wraps, or pasta.


m1.jpg

If you can't find king oyster mushrooms at your grocery store, try your local Asian market. I think the king oysters look a little more meaty, but whichever mushrooms you choose, both make for a fantastic, healthy, plant-based version of bacon.

Portobello mushrooms are much easier to find and will also work well. You may actually find that they cook slightly faster than the time listed for the king oyster mushrooms, depending on how thinly you slice them. 

portobello mushroom bacon

portobello mushroom bacon

My favorite way to enjoy mushroom bacon is on top of some vegan mac and cheese. It's the ultimate comfort food, made extra healthy with mostly unprocessed, 100% plant-based ingredients. 

Nut-free Vegan sweet potato Mac & Cheese topped with mushroom bacon

Nut-free Vegan sweet potato Mac & Cheese topped with mushroom bacon

If you try this mushroom bacon recipe, let me know how it goes and what you serve it with!

Notice: This blog post contains affiliate links, which simply means that I earn a commission if you purchase through those links, but your price remains the same. Thank you for your continued support! 


Seasonal Cherry & Apricot Nut Crumble With Vanilla Almond Cream [with raw option!]

crumble3.jpg

Early summer produce is finally here so it's the perfect time for cherries and apricots here in the Pacific Northwest. This week our CSA box was full of the most delicious fresh local fruits and we found ourselves with a dozen apricots and six pounds of beautiful fresh local cherries. 

It didn't take long before most of the cherries were devoured and since the remaining cherries and apricots were starting to soften a bit, I decided I'd use the rest of them to make a warm cherry and apricot compote filling with a raw nut & date crumble topping. 

cherrycsa.jpg

With all of this fruit in season lately, I've been loving the combination of fresh fruit with different kinds of chopped raw nuts and whipped nut creams. When the fruit had first arrived, I was enjoying the fruit on it's own as well as with almond cream and nut crumbles on top, inspired by this recipe, by Laura of The First Mess. But as the fruit I was using became a little more soft and overripe, I decided to make warm, delicately cooked, bowls of syrupy cherries and apricots, while still keeping the date and nut crumble and the almond cream fully raw.

I mainly chose to keep the nuts raw to avoid the formation of a compound called acrylamide.

In looking at research on nuts, they have been shown to form the compound acrylamide when baked at high temperatures (above 265 degrees F) which causes oxidative stress leading to cellular apoptosis, which can age us and raise disease risk. The length of baking time doesn't seem to be a factor, but keeping the temperature low is what's most important.

Just to avoid this process all together I like to keep the nuts completely raw, but if you prefer a warm nut topping, you can bake these for about 40 minutes at 250 degrees F, and avoid too much damage to the nuts. 

Raw nuts and seeds are actually some of the healthiest whole foods we can eat.

Nuts and seeds contain: LDL cholesterol-lowering phytosterols, circulation-promoting arginine (an amino acid), minerals, including potassium, calcium, magnesium, and selenium, and antioxidants, including flavonoids, resveratrol, tocopherols (vitamin E), and carotenoids.

Nuts and seeds also promote heart health. Eating five or more servings of nuts per week is estimated to reduce the risk of coronary heart disease by 35 percent. 

While it's important not to go overboard, even with raw nuts, adding them to fresh fruit and greens in small amounts helps to boost absorption of nutrients, making them healthier together than when enjoyed on their own.

crumble5.jpg

Making the Vanilla Almond Cream:

The first step is to make the raw vanilla almond cream. You'll need to soak your almonds overnight or for at least 8 hours, before draining, rinsing, and then blending them with the water, vanilla, maple syrup, and pinch of salt. Scoop the cream into a jar or container and store it in the fridge until cooled. 

If you don't like seeing little brown specks in your almond cream, you can blanch the almonds first and then run them under cold water to remove the skins, but I find it doesn't make any difference in the taste or texture of the cream and I don't mind seeing some specks. 

crumble6.jpg

There are a couple of different ways you can make this crumble. If your fruit is very fresh and at perfect ripeness, you can keep this dish completely raw, like in the original recipe, but if your fruit is overripe and a little soft, I'd recommend the cooked option.

In the cooked option I keep the nuts completely raw and add them on at the very end along with the pre-made chilled vanilla almond cream. Or if you want the nut topping a little warm, it can be baked with the crumbles on at a very low temperature (250°F). 

Raw Option:

Filling: Slice in half the cherries and apricots and remove the pits, then slice the apricots into thin wedges. Place the raw fresh fruit in a bowl and refrigerate while you make the crumble topping.  

Raw nut crumble: In a food processor, combine the walnuts, almonds, pecans, dates, vanilla, salt, and cinnamon, until broken into large crumbs and with the dates evenly dispersed and finely chopped. 

Assembly: Scoop the sliced fruit into individual bowls and top with the nut and date crumble and a dollop of cold vanilla almond cream. 

Cooked Option:

Filling: Slice in half the cherries and apricots and remove the pits, then slice the apricots into thin wedges. Place fruit in a bowl and add in the lemon juice and coconut sugar. Stir together your starch slurry in a small bowl. Heat a saucepan over medium heat and once the pan is warm add in the fruit mixture. Bring to a gentle boil then reduce heat to a simmer and add in the starch slurry, stirring as it thickens. Simmer on low heat for 3-4 minutes, when the fruit softens but before it starts to go too mushy. 

Raw nut crumble: In a food processor, combine the walnuts, almonds, pecans, dates, vanilla, salt, and cinnamon, until broken into large crumbs and with the dates evenly dispersed and finely chopped. 

Assembly: Scoop the cooked fruit filling into individual bowls if serving right away, or into an 8x8 baking dish to serve it later. Top with the raw nut and date crumble and serve with a dollop of the chilled vanilla almond cream. If you choose the baking dish option you can make the crumble ahead of time and then refrigerate it before baking it with the nut topping on for 40 minutes at 250°F, or 20 minutes at 350°F, but make sure to leave the raw nut crumble off and add it on after it's done baking. Add the chilled cream just before serving.

crumble2.jpg

Taco Salad with Walnut & Cauliflower "Meat" Crumbles

2018-06-14 02.37.34 2.jpg

This taco salad tastes just like a restaurant style take out treat, but it's made with minimally processed plant based ingredients so you can feel even better about making it an everyday kind of meal that will keep you feeling happy and healthy.  

I first tried a vegan taco salad made with raw walnut meat at a local raw vegan cafe near by and it completely blew my mind. The flavored walnut crumbles reminded me of the fast food tacos from my childhood, with all the right spices and the perfect crumbly texture.

While it was super delicious, it was also covered in oil and contained way more walnuts in a single serving than I would normally consume, and my skin was not happy about it. Since that version was a little too nut heavy for me, I set out to create my own more vegetable-based recipe using riced cauliflower and a moderate amount of walnuts and it turned out to be just as good!

2018-06-14 03.03.12 1.jpg

I didn't feel like using my food processor this time, so I chose to use thawed frozen riced cauliflower and I quickly chopped the walnuts by hand. Then I mixed them together in a bowl with some spices and tamari. 

If you are working with whole fresh cauliflower then all you'll need to do it chop it into florets then add it into the food processor and pulse a few times until crumbly, then place in a bowl. Next add the walnuts to the food processor and pulse a few times before adding them to the same bowl, then stir in the tamari and spices.

2018-06-14 03.05.34 1.jpg

Spread this mixture out in a thin layer on a baking sheet lined with parchment paper and bake for 30 minutes then give it a stir and bake for another 10 minutes until lightly golden brown. 

2018-06-14 03.04.47 1.jpg

To make this taco salad, I started with a bed of chopped spring mix, but any kind of lettuce or tender greens will work. Then on top of that I added guacamole, my roasted corn salsa, shredded purple cabbage, the walnut cauliflower crumbles, a drizzle of cashew sour cream and a squeeze of fresh lime juice. It's the perfect zesty summer salad!

This taco meat replacement is also amazing in actual tacos. in grain bowls with rice or quinoa, added to tomato sauces to make a meaty bolognese sauce, in wraps, or pile it in a big lettuce or cabbage leaf instead of a taco shell- the possibilities are endless!

What are some of your favorite summer salad recipes? If you try out this recipe I'd love to hear what you think of it! 

2018-06-14 02.59.01 1.jpg

Sweet Potato Breakfast Toast (SOS-free!)

Violet attempting to steal a strawberry

Violet attempting to steal a strawberry


Have you ever heard of slicing a sweet potato into bread slice shaped pieces and toasting it? I know It doesn't sound like it would be all that life changing, but ever since I started doing this I eat so many more sweet potatoes and way less bread than ever before! 

I still love a nice toasted slice of whole grain bread, and while bread certainly isn't bad for you, especially when whole grains are involved, bread is still a processed food and processed foods are almost always less healthy than plant foods in their whole, unprocessed form.

I've noticed that I don't feel my best when I eat too much bread or any other processed food and I don't have quite as much energy as when I eat whole foods like sweet potatoes. So for the past couple of weeks I've switched out toast or oatmeal in the morning for baked sweet potato slices and I feel better than ever and stay full for longer as well. I love choosing different combinations of toppings and find myself looking forward to breakfast more than any other meal of the day. 

While sweet potato toast won't replace your sandwich bread and the natural sweetness of the potatoes is sometimes questionable with savory toppings, I find it to be the perfect vehicle for sweet toppings like nut butters, dairy-free yogurt, berries, and other fruits. 

2018-04-24 11.54.34 1.jpg

The sweet potato slices become perfectly crispy on the outside but the inside stays soft and gets super sweet.

With oatmeal, I always have to add a little maple syrup or coconut sugar, but I don't find that I need to add any sweetener to this breakfast besides fruit and it still tastes like a dessert. Actually this recipe is completely salt, oil, and sugar-free, aka SOS-free!

There are several ways in which you can make sweet potato toast, but however you make it, be sure to eat it right after it's been cooked. If it sits out for too long after you toast it, it will be a little soggy and floppy- not at all how the sweet potato toast experience is meant to be. They won't have that same quality that makes them so delicious unless you heat them back up again in the oven or toaster until crispy.

Luckily there are many options, even a make-ahead option, that will make sweet potato toast so quick and easy that it becomes your new favorite breakfast. 

IMGL8259.JPG

Tips & Tricks

  • When picking out sweet potatoes at the store, choose ones that are a bit wide and round. While long skinny potatoes will still work, I find that I can cram more toppings on a wider slice. 
  • When it comes time to slice the potato, make sure the large knife you are using is freshly sharpened. Then slice off a very small piece of the potato in the spot where you want it to be balanced while you cut. This will give it some stability so the potato doesn't roll while you're cutting into it.
  • Then, carefully slice it the long way into 1/4-1/2 inch thick slices. It's unlikely that all your pieces will be uniform in size and that's okay, just do your best and as long as they're somewhere near that size range you're good to go! 
2018-04-19 03.20.33 3 (1).jpg

Cooking Options

Once you have your sweet potato sliced into 1/4-1/2 inch thick slices, there are a few different ways you can choose to make it into toast.

Here are a few that I've tried and tested-

Oven:

  1. Preheat oven to 400℉.
  2. Place slices on a wire rack or on a parchment paper lined baking sheet. Bake for 20-22 minutes until the slices are lightly golden on the outside and the edges are just starting to brown. Flip them over halfway through cooking time for slightly more even crisping. Enjoy right away.

Air-fryer:

This is my favorite way to make sweet potato toast because there's no waiting for the oven to preheat and I don't even have to flip the slices over because the air fryer does such an amazingly even cooking job.

  1. Place the raw sweet potato slices in the air fryer basket and cook for 18-20 minutes 390℉ or whatever setting your air fryer has for potatoes/fries. 
  2. Add toppings and serve immediately after they come out of the air fryer. 

Toaster or Toaster Oven:

Yes, believe it or not you actually can put raw sweet potato in the toaster to make sweet potato toast, but it's probably not the most efficient way to do it. You would have to stand at the toaster for a long time while you keep checking on it to make sure it doesn't burn and end up putting it through a toast cycle several times before it's done.

This might not be the best thing for your toaster too as sweet potatoes can get a little sticky sometimes. So if you do want to try this method, it's best to cook the sweet potatoes in the oven first, then store them in the fridge and toss them in the toaster or toaster oven right before you eat them. 

  1. Preheat oven to 400℉.
  2. Place slices on a wire rack or on a parchment paper lined baking sheet. Bake for 15 minutes or until potatoes are tender but not fully cooked.
  3. Remove pan from oven and allow potatoes to cool completely before transferring to storage container. Store in the fridge for up to 5 days.
  4. When you want sweet potato toast, grab a precooked slice from the fridge and put it in your toaster or toaster oven until it's crispy and golden on the outside, then enjoy right away. 
2018-04-21 10.30.51 1.jpg
2018-04-21 12.22.38 2.jpg

My Favorite Toppings

  • Nut or seed butter- (pecan, walnut, almond, cashew, sunflower etc.) I like to buy raw nuts in bulk and make nut butter myself in the food processor and always have a jar of it in the fridge. 
  • Dairy-free yogurt- ideally sugar-free, unsweetened, minimal ingredients. My favorite brand is Forager cashew yogurt, but coconut or almond yogurt can be great as well! 
  • Hemp seeds or ground flax seeds- I add these in for omega 3s when I'm using any nut butter that is high in omega 6, such as pecan, almond and cashew. When I make walnut butter which is super high in omega-3s I leave the omega-ratio-balancing seeds off.
  • Bananas- available all year & perfect for when other fruits are out of season
  • Berries- blueberries, strawberries, blackberries, raspberries, etc.
  • Other seasonal fruit- figs, plums, peaches, etc. 
  • Cinnamon- cloves and nutmeg also pair well with certain fruits like apples and pears

If you decide to try making sweet potato toast, let me know what you think of it and also what cooking method and toppings you chose to use! ☼

Tofu No-Chicken Noodle Soup with Lemon & Black Pepper [Vegan, Oil-Free, Gluten-Free]

2018-04-05 06.42.52 1.jpg

It's still cozy soup season in early April right? Here in the Pacific Northwest, although it's been a little warmer, we are still fully in the rainy season so I've been into all things cozy and comforting these days. 

Chicken noodle soup is one of those timeless classic soups that almost everyone loves. Even though I grew up as a vegetarian, I still remember enjoying cans of the Amy's no chicken noodle soup all the time. Those are great in a pinch, but nothing actually compares to a homemade soup- and this soup is so easy to make there's no excuse to go reaching for the canned stuff. 

2018-04-06 11.12.44 1.jpg
2018-04-06 11.14.54 1.jpg

The tofu "chicken" is baked in a marinade of tamari, nutritional yeast, and paprika, which makes it so savory and delicious. I recently got an air-fryer so I've been loving that for making crispy tofu, but it's just as easy and efficient to bake it in the oven for about 20 minutes. 

2018-04-05 06.45.49 1.jpg

This soup is full of zesty flavors like lemon and black pepper along with savory tofu-chicken-complementing herbs like sage, marjoram, and thyme. What brings it all together and gives it that authentic savory broth taste is the no chicken bouillon broth paste made by the brand Better Than Bouillon. It's available in most grocery stores near where they sell the broth and while the packaging says vegetarian, it's actually vegan! It's so delicious but it can be a bit high in sodium so I've listed a low-sodium option in the recipe as well. 

This recipe will please vegans and non-vegans alike! The crispy marinated tofu makes a perfect chicken substitute for even the pickiest of eaters and the broth tastes like the most classic chicken broth from your childhood, all without harming any animals.  

If you try out this recipe, I'd love to hear what you think of it! Hopefully it's exactly the soup recipe you needed to stay cozy through this rainy early spring weather. 

2018-04-05 06.53.27 1.jpg

Complete Guide to Cooking Without Oil

Coronary angiograms of the distal left anterior descending artery before (left) and after (right) 32 months of a plant-based diet without cholesterol-lowering medication, showing profound improvement. (source)

Coronary angiograms of the distal left anterior descending artery before (left) and after (right) 32 months of a plant-based diet without cholesterol-lowering medication, showing profound improvement. (source)

Oils, like any other food, aren't either good for you or bad for you, they're simply better or worse for you when compared to other foods. Oils shouldn't be avoided because they're a "bad foodand it's true that certain oils like extra virgin olive oil are certainly less bad for you than than other oils like coconut, corn, and palm. Even so, it's important to keep in mind that less damage is still damage.

From a health perspective, there's no reason to include oil in our diets. Most of us have about 2200-2500 calories in our calorie bank for the day, so it doesn't make sense to eat a highly refined, calorically dense food product, when instead we could be spending those calories on whole, unprocessed plant foods, which provide necessary fiber and nutrients. 

For the most part, I don't use any oil in my home cooking, and ever since learning to use the right substitutions and methods I don't find myself missing it at all. Lately, I rarely seek out specifically oil-free recipes since it's become easy enough to make any recipe I find without any oil. 

A few reasons to avoid oil:

  • Within hours of ingesting any kind of oil arteries stiffen and their ability to dilate is impaired.

  • The Mediterranean Diet is healthy in spite of olive oil- not because of it. The lowered heart attack risk on this diet is due to the high consumption of whole plant foods rather than the addition of olive oil.

  • The plaque that builds up in our arteries causing arterial lesions and blockages can only be cleared up by reducing total fat intake, not by choosing different "better" kinds of fats.

  • By age 10, almost all kids have fatty streaks in their arteries which is the first sign of atherosclerosis, the leading cause of death in the United States. So most of us should be eating for the purpose of reversing the heart disease that we likely already have.


How to cook without oil on the stovetop:

2018-02-27 05.11.15 1.jpg
  • Use nontoxic, nonstick cookware made of stainless steel, enamel-coated cast iron, or ceramic titanium.

  • Instead of frying vegetables in oil, use small amounts of vegetable broth, water, vinegar, or tamari/coconut aminos to keep things from sticking to the pan.

  • The key to this method is to add whichever liquid you're choosing a few teaspoons at a time. Just enough to release some steam and keep things from getting stuck to the pan, but not so much that the vegetables are sitting in a puddle. The pan should be hot enough that the liquid you add boils away somewhat quickly, but never turn the heat higher than medium-high to protect your pan from heat damage. Once it boils away completely, add another very small splash of liquid and stir things around to free them up again. Repeat this process until your food is fully cooked.

  • Note that things won't always brown as much when using this method vs. when using oil. If want to something to brown or char slightly, let all of the liquid evaporate from the pan, or don't use any liquid in the first place, then let the food cook in the dry pan while watching carefully to see when it browns. Once it browns, you can add a very small amount liquid to the pan stop it from overcooking and burning or remove it from the pan entirely depending on the recipe.

  • Consider the temperature of the pan. Too much liquid added in during cooking time will cool down the pan and greatly slow down the cooking speed, so be sure to add as little as possible. Or if you accidentally add too much, adjust the temperature so it can boil again and evaporate away.


How to bake without oil:

muffin2.jpg
  • For baking, I like to use silicone cookware. It's nontoxic and the flexibility of it allows baked goods to just pop right out, no greasing the pan needed. Silicone bakeware will require that you increase the baking time, usually about by 3-6 minutes, depending on the recipe.

  • Some baked dessert recipes call for cups full of oil. When this happens there are many options for replacements: nut butters, dairy-free yogurts, applesauce, sweet potato or squash puree, pureed prunes or dates, or mashed banana.

  • When choosing an oil replacement in baking, take into consideration the recipe you're making and try to discern what the oil is being used for in that specific case (to add moisture, to add structure, etc.) . Be sure to also choose a replacement with a flavor or texture that would best suit that particular recipe.

  • This sometimes takes a bit of trial and error, but after a few attempts you'll find what works best for any given recipe.


How to roast without oil: 

squash1.jpg
  • Instead of greasing the baking sheet, use a silpat or parchment paper to keep the pan lean and the veggies from sticking

  • Use another liquid to get the spices to stick to what you're roasting such as water, vegetable broth, tamari, maple syrup, mustard, vinegar, etc. depending on the recipe (full list down below).

  • If you have a spray bottle, it can really help to use that to mist water or liquid of choice on to the vegetables you're roasting, then toss to coat with seasonings.

  • Oil-free roasted veggies can dry out, but to avoid this as much as possible roast them low and slow

  • To achieve a shiny glaze on the surface of the vegetable without any oil, brush on some aquafaba, the cooking broth leftover from cooking beans.

  • Give them some room to breathe and don't overcrowd the pan- this should help them to get more brown and crispy.

  • Another trick to get your veggies to brown more is to use a glass baking dish with no parchment paper at all, just place the chopped veggies right on the glass. This will help them to get slightly more brown than if you used parchment paper.

  • Make sure to chop everything you plan to bake in chunks that are pretty much the same exact size to prevent uneven cooking.

  • Stir the roasted vegetables around a bit after about 10 minutes of cooking to ensure they don't get stuck to the pan if you're not using parchment paper or other non-stick surface. This will also help them to cook evenly.


Deep Frying Alternatives

My favorite kitchen appliance by far is my Air Fryer

It makes any whole plant food I put in there turn into the most crunchy and evenly crispy treat, all with no oil needed! 

It's very easy to use and clean, and the best part about it is you don't have to wait for it to preheat.

This device has greatly cut down on the amount of time I spend in the kitchen and it makes the best crispy tofu I've ever had.

While it's not necessary to have an air fryer to eat an oil-free diet, it certainly makes it a lot easier!  

2018-06-05 12.35.24 1.jpg

What to Use Instead of Oil

I mentioned previously that I like to use a glass spray bottle to evenly spritz my roasted veggies with liquid. While this isn't necessary, I find that it makes it much easier to lightly coat the veggies with a liquid instead of using oil. 

2018-06-05 04.46.06 1.jpg

While these liquid oil-substitutes wont prevent stuff from sticking to the pan (that's what parchment paper is for!) and they will evaporate over the cooking time, they still add in a bit of moisture to help prevent things from drying out while roasting and impart a really nice flavor.

It's also been nice to have a reason to save my cooking broth rather than pour it down the drain, especially when I make a nice salty broth and use lots of flavorful fresh herbs. These cooking liquids are so much more flavorful than most oils. 

Here are some of my favorite oil-alternatives for roasting veggies:

  • Tamari (low-sodium)

  • Coconut aminos

  • Vegetable broth

  • Leftover cooking broth, the one I'm using now is leftover from cooking white beans and thyme

  • Vinegar, such as apple cider vinegar or balsamic

  • Leftover liquid from steaming vegetables, a.k.a. pot liquor such as from steamed beets, potatoes, greens, etc.

2018-06-05 04.43.05 1.jpg

Those are all of my best tips for cooking without oil! Hopefully you've found these tips helpful and can start to cook oil-free with confidence. 

It will definitely take some time and experimentation to get it right the first few times you try this but after a while it will become much more intuitive. Expect a little trial and error in the learning process. Cooking without oil isn't the easiest thing- my partner calls it cooking on hard-mode, and that's exactly what it feels like initially, but once you get the hang of it you'll have a valuable skill that could actually improve the quality of your life and your long-term overall health. 

Notice: This blog post contains affiliate links, which simply means that I earn a commission if you purchase through those links, but your price remains the same. Thank you for your continued support! 

Oil-Free Veggie Fried Rice with Peanut Sauce

2018-03-01 01.33.43 1.jpg

Lately, I've been loving this rice and veggie stir-fry. Fried rice was a dish I was pretty sure I would never be able to make taste just as good without oil, but with the right sauce it's actually very possible!

Instead of oil, we fry the vegetables in coconut aminos which adds a wonderful umami flavor. Then the cooked rice is added in along with a savory peanut sauce which makes this dish taste rich without needing any refined oil. 

For this recipe, you can use any kind of whole grain rice you like. I've used wild rice, black rice, brown rice, and even quinoa- all with fantastic results. I think black rice is probably my favorite though, and it's actually the highest in antioxidants too!

Whichever rice or other similar whole grain that you decide to use, the first step is to give it a good rinse and then cook it in your rice cooker. 

IMGL5856.JPG

While the rice is cooking, prepare your veggies. You can use 2-3 cups of whichever finely chopped vegetables you prefer. I usually go for a mix of bell pepper, carrots, broccoli/broccolini, and edamame or peas.

While the variety of those veggies changes a bit each time I make it, I always use chopped green onions and garlic to add more flavor and give it a more authentic restaurant-style fried rice taste.

rice3.jpg

Once you have your veggies chopped, it's time to make the sauce. 

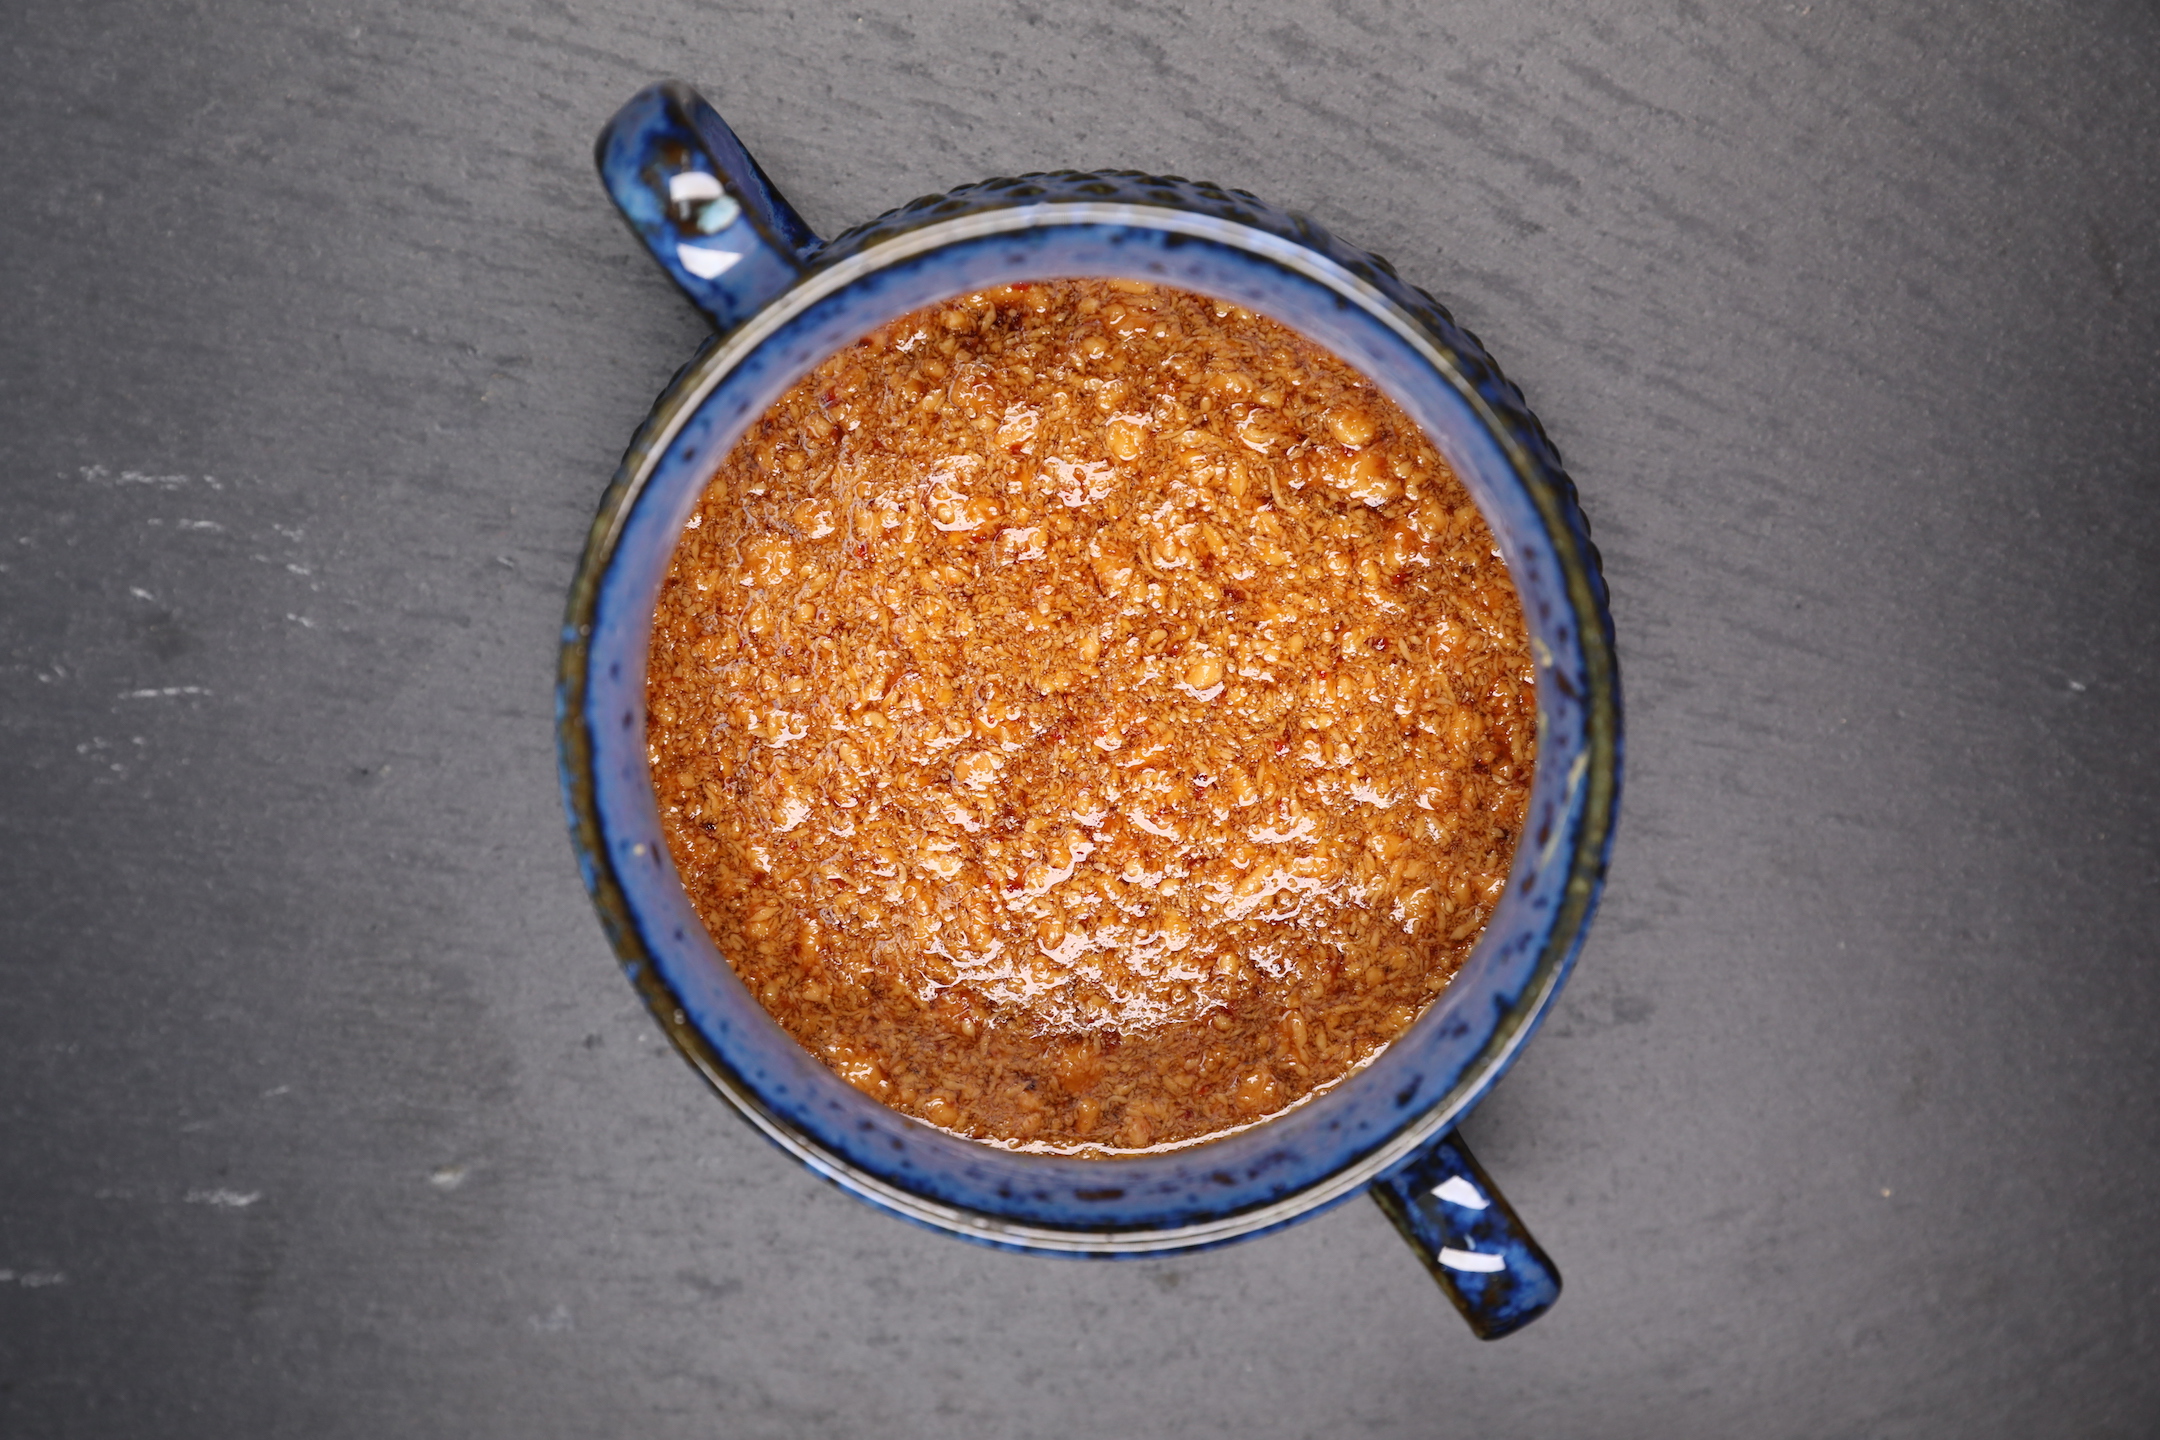
My favorite stir-fry sauce is this spicy & savory peanut sauce. It's a simple mix of coconut aminos (or use low-sodium tamari), peanut butter, hot sauce, and maple syrup. There's no blending required- simply add the ingredients into a small bowl and give it a good stir until creamy. 

IMGL5844.JPG

Now on to the oil-free vegetable frying-

To make the veggies extra savory and avoid having them be soggy, I like to use just a 1/2 tablespoon of coconut aminos in place of oil. 

Once the pan is hot, add the coconut aminos and garlic, cook for a few minutes then and the rest of the veggies. Since they are chopped small, they cook in about 5 minutes. Then, add in the cooked rice followed by the sauce. Stir it all together while the rice cooks with the veggies for another 2-3 minutes. Then add in the green onions at the very end, remove from heat and serve. 

2018-03-01 01.37.05 2.jpg

Let me know if you try out this easy oil-free veggie fried rice recipe, I'd love to hear what you think of it!


Tempeh Bacon, Lettuce & Tomato Wrap [Vegan BLT]

2018-02-15 05.30.22 1.jpg

This marinated tempeh & veggie wrap has been one of my favorite quick lunch recipes all week. Ever since getting the hang of preparing tempeh, I've been all about adding it to wraps, sandwiches, salads, and stir-frys. 

The trick with cooking tempeh is either steaming it or water-frying for about 8-10 minutes before marinating it. This removes any bitter fermented flavors from the tempeh and allows it to easily take on the flavors of the marinade. 

tlt22.jpg

There are so many different ways to marinate and prepare tempeh, but for tempeh in a wrap I like to stick with a simple marinade consisting of coconut aminos (or tamari) maple syrup, and balsamic vinegar. Sometimes I also use just a bit of liquid smoke for a different flavor, but it's not entirely necessary and can be omitted. 

The longer you allow the tempeh to marinate (up to 24 hours), the better the flavor will be, but I'm one of those people who never remembers to plan ahead and I usually decide to cook something on a whim, which means often I manage to only marinate the tempeh for anywhere between 15-30 minutes, and it still takes on plenty of flavor in that amount of time.

Once the tempeh has marinated, you can either bake it in the oven or fry it in a pan on the stovetop for a few minutes on each side. I usually go with the baking option so I can cook all of the pieces at the same time. 

tlt33.jpg

The firm and crispy texture of the tempeh makes it fantastic as a bacon substitute in this BLT style wrap. The marinade is just the right balance of salty, tangy and sweet and makes the tempeh taste savory and delicious. 

I used a spring mix lettuce blend, fresh tomatoes, green onions, avocado with lime juice, and I added shredded carrots for some extra crunch, though finely chopped purple cabbage would well work in place of the carrots too. 

I find that when making a wrap it's important to use a spread of some sort because it helps to hold the wrap together when you're rolling it all up. There are a few different options for the spread to use in this wrap.

This week I've been going back and forth between using this homemade green olive hummus and this homemade pumpkin seed pesto sauce. They are both easy to whip up in the blender in about 5 minutes, but for more classic BLT and less preparation, use a vegan mayo spread.

Let me know if you try this out, I'd love to hear what you think of the recipe!


5-Ingredient Matcha Coconut Crispy Bars [Refined Sugar-Free, Gluten-Free, Vegan]

matchafinal.jpg

These crispy matcha coconut bars contain only FIVE ingredients and require almost no cooking! The only part of the recipe that comes close to cooking is softening the coconut butter, which can be done on the stovetop but it will also soften up in just 20-30 seconds in the microwave. 

Next you simply mix all of the remaining ingredients together in a bowl and then press the mixture into a dish. Let it cool in the fridge for at least an hour, then slice and serve. It doesn't get any easier than this!

Here are the 5 ingredients you'll need:

  • coconut butter
  • maple syrup
  • vanilla extract
  • matcha powder (optional)
  • brown crisped rice cereal, preferably one-ingredient and sugar free

While I wouldn't consider coconut butter to be a health food and it's definitely more of a special occasion sort of treat, I still consider it to be a healthier alternative to coconut oil. 

One tablespoon of coconut butter provides 2 grams of fiber as well as small amounts of potassium, magnesium, and iron. Meanwhile, coconut oil has had everything good removed including all of the fiber and micronutrients so you're left with 100% refined saturated fat. Coconut butter is much closer to being in its whole food form and still provides some nutrients, so I feel comfortable using it on rare occasions and especially when cooking for others who enjoy a rich dessert or are curious to try vegan food.

Recipe below!

matchafinl2.jpg

Flax Crackers & Green Olive Hummus [Oil-Free, Vegan]

0 (2).jpeg

Sometimes you just need a good salty, crunchy snack, but store bought crackers often contain questionable ingredients and preservatives. For the longest time, I put off making my own healthy crackers because I thought it would be impossible to make crackers without oil and flour, two ingredients which I avoid using often in my home cooking.

One day, I finally stopped doubting myself and experimented with making a flax and almond based cracker and to my surprise it turned out crunchy and delicious.

I haven't had to buy crackers from the store ever since!

My favorite way to enjoy these crackers lately is to dip them in hummus and lately my favorite hummus flavor has been roasted garlic and green olive.

The hummus is super simple to make and it blends up very easily. I get kind of frustrated when I make a hummus recipe which requires a lot of scraping down the sides of the blender and is so thick that the blades get stuck.

The trick for a good fluffy hummus, is to save some of the brine from the can of chickpeas and use that in the mixture to achieve a whipped texture. This also makes the blending process much easier and faster. 

hummusolive.jpg

This recipe makes roughly 16 oz. of hummus which fits perfectly in a mason jar! The hummus will last for up to a week when stored in a sealed container in the fridge.


Chickpea "Tuna" Wrap with Oil-Free Pepita Pesto [Vegan]

finaltuna.jpg

These chickpea "tuna" salad wraps with pesto sauce are the perfect meal-prep lunch recipe to keep you feeling healthy and satisfied during the work week. The best part: NO cooking is required to make either the pesto sauce or the chickpea salad! All you need is a blender for the pesto sauce and a mixing bowl and masher for the chickpeas. 

To be completely honest, I don't quite remember what tuna tastes like. I haven't had a tuna sandwich since I was a little kid, so I couldn't tell you if this actually tastes like tuna fish or just a delicious chickpea salad.

I would've just called it a chickpea salad wrap, but with the addition of some finely chopped seaweed in the mix, I feel pretty confident that these smashed chickpeas have a touch of oceanic flavor and a texture that gives off some tuna vibes. 🐟

While it might not be just like tuna, there are many reasons to try chickpeas instead and avoid eating tuna and other sea life-

  1. Mercury and other toxic heavy metals bioaccumulate up the food chain, so large fish that eat smaller fish, like tuna, often contain extremely high levels of these heavy metals as well as industrial pollutants. Even small amounts of mercury can negatively impact our digestive and nervous systems. This risk greatly outweighs any benefits we would receive from the omega 3 fatty acids in fish, so it's much safer to get your EPA/DHA lower down on the food chain, in the form of a micro algae supplement.

  2. Overfishing is destroying the oceans and the way in which tuna are captured is actually really disturbing. They are caught by net which means they have a slow and painful death and are often crushed by the weight of other tuna and sea life as they are dragged to the surface.

  3. The CDC says that 75% of all food poisoning comes from seafood. I have experienced this for myself when I once ordered vegan avocado sushi rolls from a sushi restaurant that serves fish and got the worst food poisoning of my life due to cross contamination from the fish they were preparing on the same surface.

  4. Tuna fishing kills more than just tuna. Dolphins, sea turtles, sharks, and other sea life are also often killed when they're accidentally caught in fishing nets.

  5. Farmed fish are not any better off. They often live in cramped conditions to increase profits, which puts them at a high risk for disease and parasitic infections. To keep the fish alive, fish farmers often give the fish powerful medications and antibiotics which we then ingest. These aquafarms are not even a more environmentally friendly choice. A 2-acre salmon farm produces as much waste as a town of 10,000 people.

  6. Fish DO feel pain and in many ways, such as their memory and cognitive abilities, they are just as smart as certain vertebrates and even primates. They are playful, social, and some fish even use tools. Why choose to eat them when there are other options?


This pesto sauce made with pepitas (shelled pumpkin seeds) is my new go-to pesto recipe to spread on everything. It only requires a handful of ingredients and as always I made it completely oil-free. Most of the recipes I have found use up to half a cup of oil, which is really damaging for the health of our arteries.

Even so-called "healthy" oils like extra virgin olive oil cause more damage than if we just didn't eat the oil at all. The natural oils found in the pepitas, which still retain their fiber and micronutrients, are a much healthier way to enjoy a delicious fresh pesto, full of necessary unrefined whole plant fats. 

tp4.jpg

This pesto is easy to make quickly in the blender. I find that it blends very easily in my high-speed blender, no scraping down the sides required, but a food processor should do a great job of it as well.

It's so tasty I could eat it by the spoonful!

tp2.jpg

The chickpea "tuna" salad is also super simple to make. Just throw all of the ingredients into a mixing bowl, then give it a good mash and stir until it's still a little chunky, but evenly mixed. 

tp5.jpg
tp6.jpg

Make the wrap by starting with a layer of pesto sauce, then add a handful of fresh greens, cabbage, and carrots (I forgot to add in the carrots this time), and a nice thick line of the chickpea salad. Fold in the sides of the wrap then roll it up. For extra wrap-security, roll it up again in some parchment paper and tie it with a string.

It's a great recipe to take on the go as a packed lunch for work or school. The leftover chickpea salad and pesto sauce can be stored separately in sealed containers in the fridge for 4-5 days. The leftover pesto sauce is acutally fantastic on pasta as well!

This chickpea tuna is also great on sandwiches!

This chickpea tuna is also great on sandwiches!

tp3.jpg

White Bean, Cherry Tomato & Heart of Palm Salad with Refreshing Lemon Basil Dressing

bl1sm.jpg

If you love refreshing and zesty salads and are looking for a healthy alternative to fresh mozzarella, you'll love this salad recipe!

I have been loving heart of palm as a mozzarella replacement in salads lately. The texture and mild flavor is similar to fresh mozzarella and with the right dressing it can taste very similar. For convenience, I like to use canned heart of palm which is readily available and easy to drain, slice, and serve. 

I added in white beans for extra protein and fiber along with fresh cherry tomatoes, cucumber, avocado, and sliced green onion.

The dressing is what makes this salad so delicious and zesty. It's super easy to throw together quickly in the blender. First, add to the blender the lemon juice, water, vegan cashew parmesan (or nutritional yeast), garlic, and mustard and blend until combined. Then, add in the basil leaves and pulse a few times until shredded into small pieces. 

It's amazing how flavorful this dressing is with no oil needed! The lemon juice and fresh basil in combination with cherry tomatoes, avocado, and heart of palm makes for a deliciously healthy fresh salad that's actually so filling and satisfying. 


bl2sm.jpg