Chocolate Cherry Smoothie

choccherry.jpg

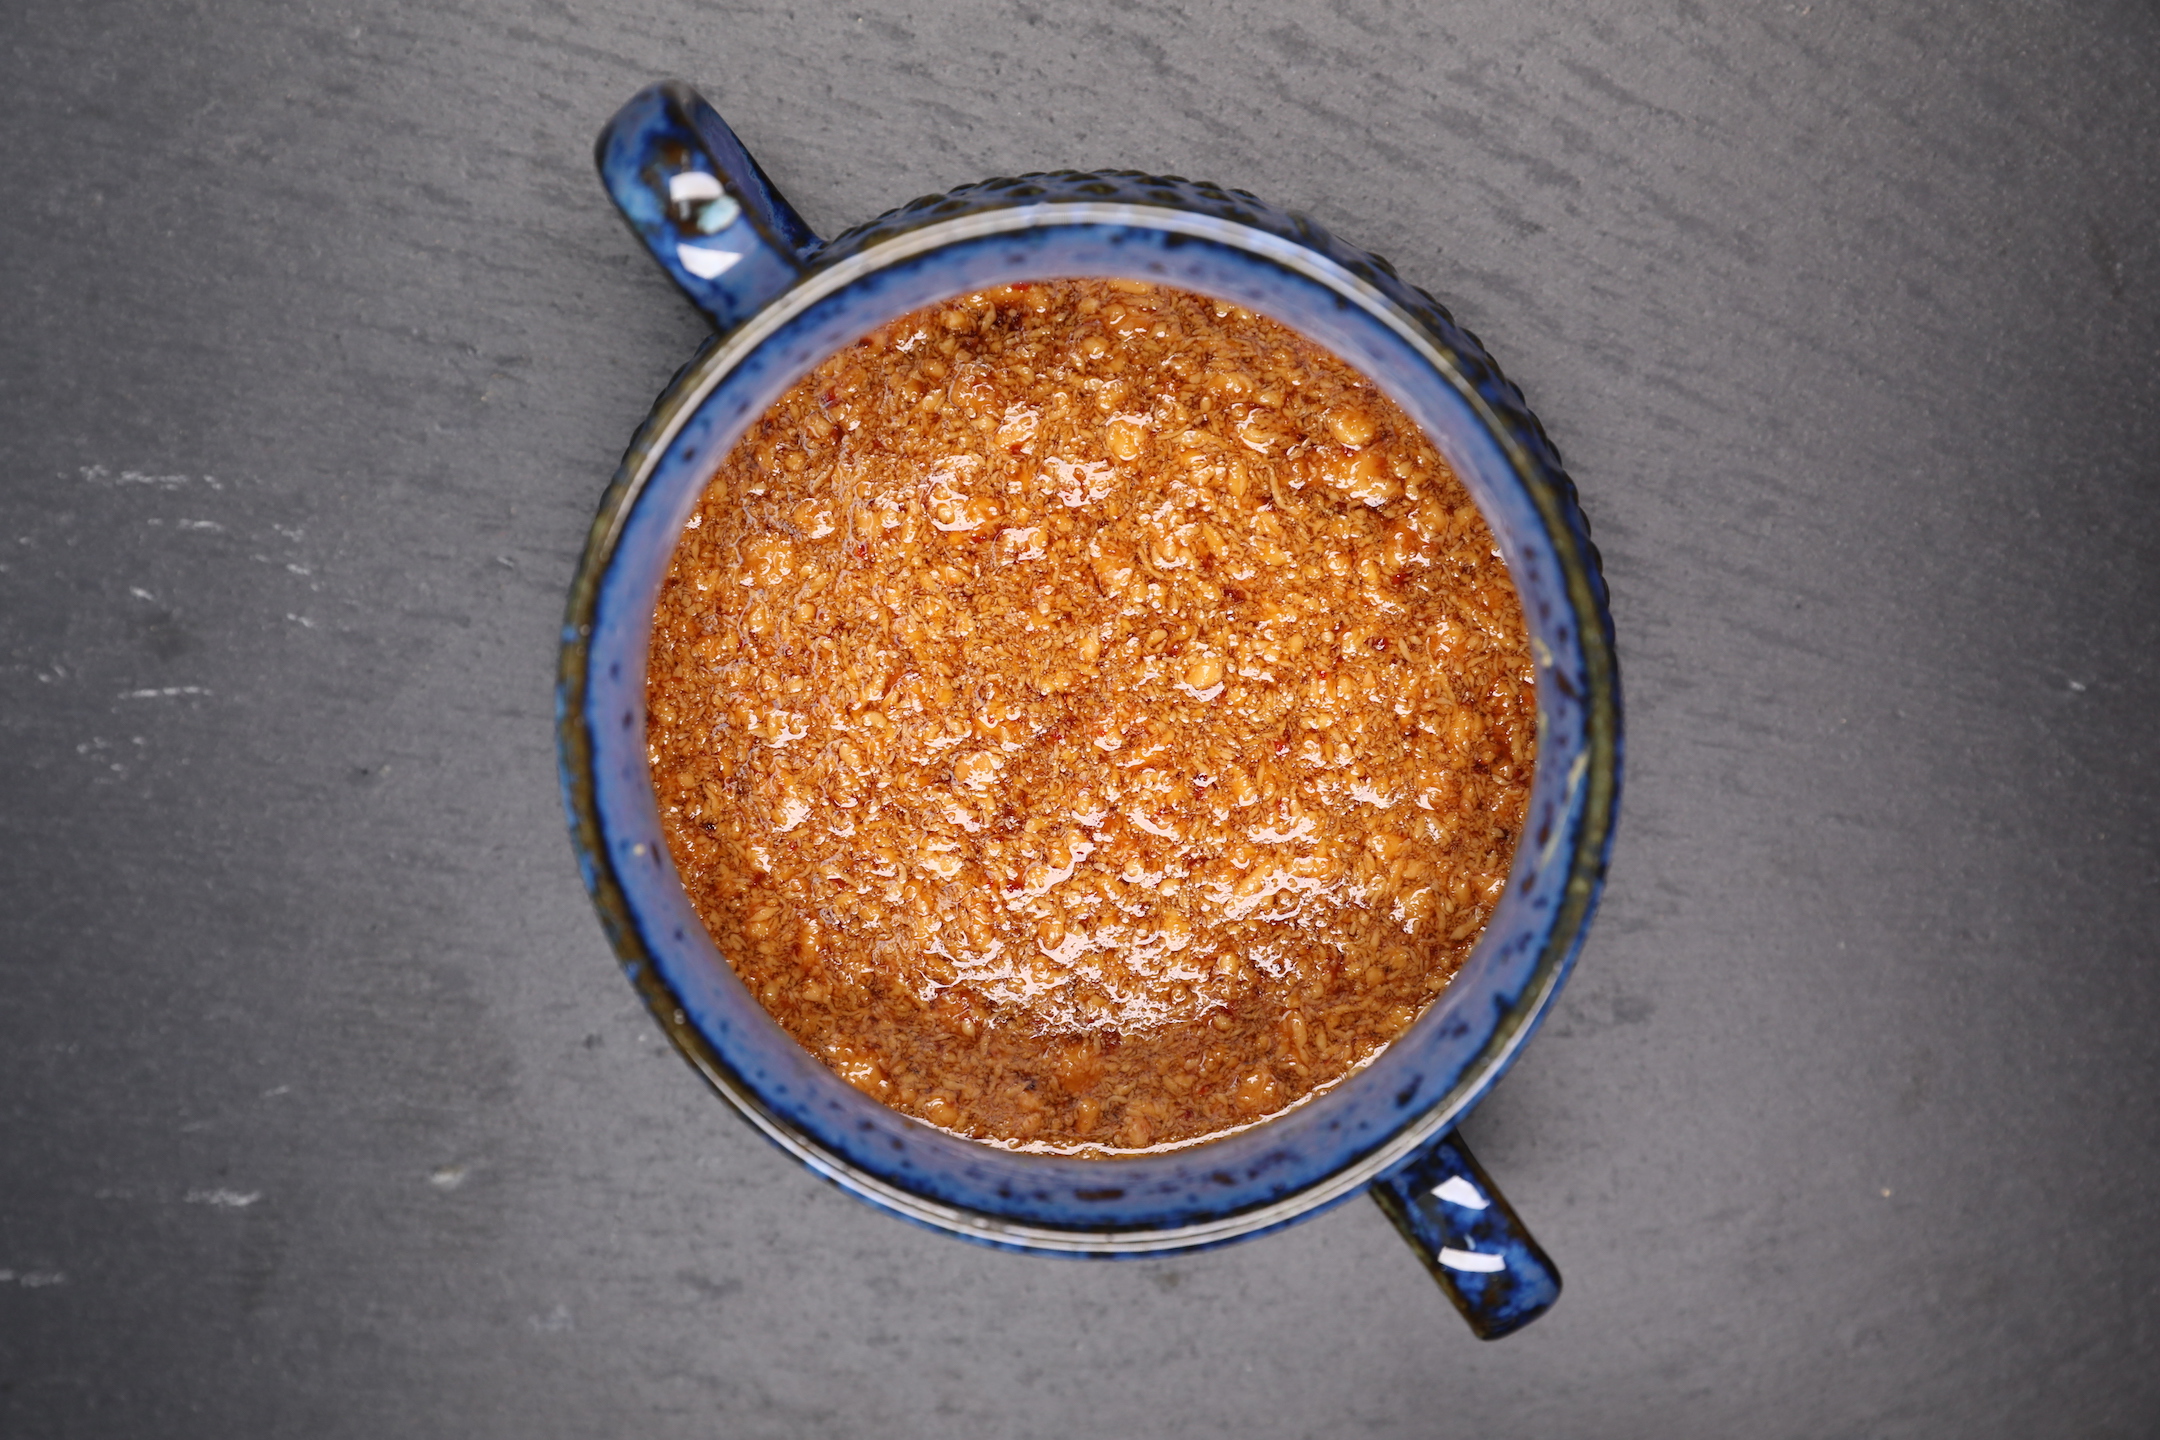
This chocolate cherry smoothie is the perfect indulgent, yet secretly-healthy summer beverage. Chocolate and cherries are one of my favorite food pairings, but these days when it's too hot to turn on the oven it's time to consider other ways to make that combination happen, so this week I've been making this delicious smoothie quite often.

A couple of weeks ago I mentioned that we got six pounds of cherries in our CSA box, which we quickly devoured raw and any leftovers went into baked goods. Well, last week we took it to a whole new level when we got a whole 18-pound case of cherries from the farmers market- which I realize sounds insane given that my household has just two people and one small rabbit (who doesn't eat fruit), but once I pitted all of them and put them in the freezer they fit in two gallon sized freezer bags, which is actually a pretty manageable amount to store and use up within a reasonable time frame.

Because of this, you may have noticed that I've been making a lot of cherry recipes lately- probably too many, but I promise there are some cherry-free recipes coming soon!

For now, I've been fully enjoying cooking with them, photographing them, and eating handfuls every time I pass by the fridge. 

smallcherry.jpg

I haven't posted many smoothie recipes on my blog- actually, I just checked and this is the first one! That's because there's only a very brief time of the year when I can enjoy a smoothie without feeling like I'm turning into a human ice cube, and now that it's above 80 degrees most days here in the PNW, I am fully enjoying icy cold smoothies- and not even needing to take a hot shower after to warm up!

While I can't fathom enjoying a smoothie any other time of the year than in the summer, if you're reading this and you're the kind of person who can drink a cold smoothie in the dead of winter, you go right ahead! There's no need to wait for cherry season to come around to make this smoothie since most grocery stores will have frozen cherries available all year. 

For added nutrition, you can blend a handful of spinach or kale into the smoothie and the sweetness of the cherries will completely mask any flavors from the greens. 

I hope you enjoy the recipe!


Seasonal Cherry & Apricot Nut Crumble With Vanilla Almond Cream [with raw option!]

crumble3.jpg

Early summer produce is finally here so it's the perfect time for cherries and apricots here in the Pacific Northwest. This week our CSA box was full of the most delicious fresh local fruits and we found ourselves with a dozen apricots and six pounds of beautiful fresh local cherries. 

It didn't take long before most of the cherries were devoured and since the remaining cherries and apricots were starting to soften a bit, I decided I'd use the rest of them to make a warm cherry and apricot compote filling with a raw nut & date crumble topping. 

cherrycsa.jpg

With all of this fruit in season lately, I've been loving the combination of fresh fruit with different kinds of chopped raw nuts and whipped nut creams. When the fruit had first arrived, I was enjoying the fruit on it's own as well as with almond cream and nut crumbles on top, inspired by this recipe, by Laura of The First Mess. But as the fruit I was using became a little more soft and overripe, I decided to make warm, delicately cooked, bowls of syrupy cherries and apricots, while still keeping the date and nut crumble and the almond cream fully raw.

I mainly chose to keep the nuts raw to avoid the formation of a compound called acrylamide.

In looking at research on nuts, they have been shown to form the compound acrylamide when baked at high temperatures (above 265 degrees F) which causes oxidative stress leading to cellular apoptosis, which can age us and raise disease risk. The length of baking time doesn't seem to be a factor, but keeping the temperature low is what's most important.

Just to avoid this process all together I like to keep the nuts completely raw, but if you prefer a warm nut topping, you can bake these for about 40 minutes at 250 degrees F, and avoid too much damage to the nuts. 

Raw nuts and seeds are actually some of the healthiest whole foods we can eat.

Nuts and seeds contain: LDL cholesterol-lowering phytosterols, circulation-promoting arginine (an amino acid), minerals, including potassium, calcium, magnesium, and selenium, and antioxidants, including flavonoids, resveratrol, tocopherols (vitamin E), and carotenoids.

Nuts and seeds also promote heart health. Eating five or more servings of nuts per week is estimated to reduce the risk of coronary heart disease by 35 percent. 

While it's important not to go overboard, even with raw nuts, adding them to fresh fruit and greens in small amounts helps to boost absorption of nutrients, making them healthier together than when enjoyed on their own.

crumble5.jpg

Making the Vanilla Almond Cream:

The first step is to make the raw vanilla almond cream. You'll need to soak your almonds overnight or for at least 8 hours, before draining, rinsing, and then blending them with the water, vanilla, maple syrup, and pinch of salt. Scoop the cream into a jar or container and store it in the fridge until cooled. 

If you don't like seeing little brown specks in your almond cream, you can blanch the almonds first and then run them under cold water to remove the skins, but I find it doesn't make any difference in the taste or texture of the cream and I don't mind seeing some specks. 

crumble6.jpg

There are a couple of different ways you can make this crumble. If your fruit is very fresh and at perfect ripeness, you can keep this dish completely raw, like in the original recipe, but if your fruit is overripe and a little soft, I'd recommend the cooked option.

In the cooked option I keep the nuts completely raw and add them on at the very end along with the pre-made chilled vanilla almond cream. Or if you want the nut topping a little warm, it can be baked with the crumbles on at a very low temperature (250°F). 

Raw Option:

Filling: Slice in half the cherries and apricots and remove the pits, then slice the apricots into thin wedges. Place the raw fresh fruit in a bowl and refrigerate while you make the crumble topping.  

Raw nut crumble: In a food processor, combine the walnuts, almonds, pecans, dates, vanilla, salt, and cinnamon, until broken into large crumbs and with the dates evenly dispersed and finely chopped. 

Assembly: Scoop the sliced fruit into individual bowls and top with the nut and date crumble and a dollop of cold vanilla almond cream. 

Cooked Option:

Filling: Slice in half the cherries and apricots and remove the pits, then slice the apricots into thin wedges. Place fruit in a bowl and add in the lemon juice and coconut sugar. Stir together your starch slurry in a small bowl. Heat a saucepan over medium heat and once the pan is warm add in the fruit mixture. Bring to a gentle boil then reduce heat to a simmer and add in the starch slurry, stirring as it thickens. Simmer on low heat for 3-4 minutes, when the fruit softens but before it starts to go too mushy. 

Raw nut crumble: In a food processor, combine the walnuts, almonds, pecans, dates, vanilla, salt, and cinnamon, until broken into large crumbs and with the dates evenly dispersed and finely chopped. 

Assembly: Scoop the cooked fruit filling into individual bowls if serving right away, or into an 8x8 baking dish to serve it later. Top with the raw nut and date crumble and serve with a dollop of the chilled vanilla almond cream. If you choose the baking dish option you can make the crumble ahead of time and then refrigerate it before baking it with the nut topping on for 40 minutes at 250°F, or 20 minutes at 350°F, but make sure to leave the raw nut crumble off and add it on after it's done baking. Add the chilled cream just before serving.

crumble2.jpg

Taco Salad with Walnut & Cauliflower "Meat" Crumbles

2018-06-14 02.37.34 2.jpg

This taco salad tastes just like a restaurant style take out treat, but it's made with minimally processed plant based ingredients so you can feel even better about making it an everyday kind of meal that will keep you feeling happy and healthy.  

I first tried a vegan taco salad made with raw walnut meat at a local raw vegan cafe near by and it completely blew my mind. The flavored walnut crumbles reminded me of the fast food tacos from my childhood, with all the right spices and the perfect crumbly texture.

While it was super delicious, it was also covered in oil and contained way more walnuts in a single serving than I would normally consume, and my skin was not happy about it. Since that version was a little too nut heavy for me, I set out to create my own more vegetable-based recipe using riced cauliflower and a moderate amount of walnuts and it turned out to be just as good!

2018-06-14 03.03.12 1.jpg

I didn't feel like using my food processor this time, so I chose to use thawed frozen riced cauliflower and I quickly chopped the walnuts by hand. Then I mixed them together in a bowl with some spices and tamari. 

If you are working with whole fresh cauliflower then all you'll need to do it chop it into florets then add it into the food processor and pulse a few times until crumbly, then place in a bowl. Next add the walnuts to the food processor and pulse a few times before adding them to the same bowl, then stir in the tamari and spices.

2018-06-14 03.05.34 1.jpg

Spread this mixture out in a thin layer on a baking sheet lined with parchment paper and bake for 30 minutes then give it a stir and bake for another 10 minutes until lightly golden brown. 

2018-06-14 03.04.47 1.jpg

To make this taco salad, I started with a bed of chopped spring mix, but any kind of lettuce or tender greens will work. Then on top of that I added guacamole, my roasted corn salsa, shredded purple cabbage, the walnut cauliflower crumbles, a drizzle of cashew sour cream and a squeeze of fresh lime juice. It's the perfect zesty summer salad!

This taco meat replacement is also amazing in actual tacos. in grain bowls with rice or quinoa, added to tomato sauces to make a meaty bolognese sauce, in wraps, or pile it in a big lettuce or cabbage leaf instead of a taco shell- the possibilities are endless!

What are some of your favorite summer salad recipes? If you try out this recipe I'd love to hear what you think of it! 

2018-06-14 02.59.01 1.jpg

Instant Pot Burrito Bowl with Roasted Corn Salsa

2018-06-04 06.13.42 1_5.jpg

Beans and rice are a staple in my kitchen because not only are they super healthy, they're also budget friendly and so easy to make- especially in a pressure cooker like an Instant Pot. This simple beans and rice recipe is made with dried black beans, which are less expensive than canned and make for the best restaurant-style beans. 

While I love the instant pot now, it's taken me a long while to figure out how the dang thing works. When we moved into our new place, I picked up two new kitchen appliances at the same time, an air fryer and an instant pot. The air fryer, being as straight forward as an appliance can be, has been something I've used multiple times a day, but the instant pot took me a little longer to figure out.

What has impressed me the most about the instant pot is the fact that I can cook dried, un-soaked, beans, and in under an hour and  the result is the best fully-cooked flavored beans. Even though not soaking them is possible and very helpful when short on time, I still like to give my beans a good soak for at least a few hours ahead of time, so I can rinse out some extra lectins and make the beans even easier to digest. 

I topped it off with a delicious roasted corn salad, made with freshly roasted ears of corn, tomato, bell pepper, red onion, lime juice, and cilantro (or parsley if you're not a cilantro fan like me!) Not only is this salsa the perfect burrito bowl topping, it's also amazing in wraps, on veggie burgers, on top of chili, or even on it's own as a side dish. 

2018-06-04 04.21.34 1.jpg
2018-06-04 06.38.19 1.jpg

How to Make Black Beans & Rice in an Instant Pot

1. Rinse and drain your dried black beans. Soak the black beans for a few hours if you have time, if not that's okay too. 

2. Chop your onion and garlic and then press the Saute button on your instant pot and wait for it to heat up. Add a small splash of water or broth then add in the onions. Cook the onions for 5 minutes, then add in the garlic and spices and continue to cook for another minute. 

3. Turn off the Saute mode by hitting cancel, then add in the beans, rice, vegetable broth, and salt, and give it a quick stir. 

4. Place the cover on the Instant Pot and set the valve to the sealing position (pointed away from you). Set the Instant pot to 30 minutes on HIGH pressure in manual pressure cooking mode. 

5. Allow the pressure cooker to release the pressure naturally for at least 15 minutes before releasing the valve and opening the lid. Give the beans and rice a good stir and then serve with the roasted corn salsa. 

*If you don't have an instant pot or pressure cooker cook the rice and beans separately. Cook your rice in a rice cooker or on the stovetop, and use canned beans or cook dried beans from scratch on the stovetop or rice cooker, then mix them together and top with the roasted corn salsa. 

This is a freezer-friendly meal that can be prepared ahead of time and enjoyed with all sorts of different toppings, so make a big batch to have instant burrito bowls ready to go for several weeks. 

If you try this recipe, I'd love to hear what you think of it. Leave a comment down below and let me know how it turns out! ❀


2018-06-04 06.31.13 1 (1).jpg

Vanilla Overnight Oats with Hemp & Chia Seeds

2018-05-21 11.24.31 1.jpg

As the weather is warming up these days I've been finding myself craving colder food again, so for now I've ditched the hot breakfast grains and started opting for overnight oats.

Overnight oats are similar to oatmeal, but instead of heating the oats to soften them, they soften on their own through the process of soaking overnight in the fridge. When I first heard about this idea a few years ago, I didn't find it all that appealing- I mean who wants to eat soggy cold oatmeal? Out of curiosity I eventually tried it for myself and added in some hemp and chia seeds, and surprisingly it wasn't like eating soggy oatmeal at all. The texture was thick, creamy, and much more similar to a chia seed pudding than oatmeal. It's been one of my go-to breakfasts ever since!

2018-05-21 11.35.47 1.jpg

All you need is a mason jar or tupperware container with a lid, about 16 oz. size should be perfect. Mix together the rolled oats, hemp seeds, chia seeds, salt, vanilla, and cinnamon and give it a stir, then add in the plant milk. Close the jar and give it a good shake and let it sit overnight in the fridge, or for at least 4 hours. (The longer it sits the better, up to 24 hours.)

The next morning when you're ready for breakfast, add in some fresh berries or any chopped fruit you'd like. To make it even sweeter you can add a bit of maple syrup, or for a healthier, lower sugar option mix in a sliced or mashed banana. 

Overnight oats doesn't have to be limited to breakfast food. Sometimes I make a batch in the morning so I can let it soak all day and have "overnight" oats for dessert. It also makes a great portable meal to take on the go or to eat while traveling. 

While there are several variations and flavors you could add to change it up, I usually keep things simple, so for now here's my easiest, most basic overnight oats recipe. Enjoy!


From Junk Food Vegetarian to Whole Foods Vegan- How I Started Making Healthier Choices

Me in 2013 with tostitos, Goldfish, and two bags of potato chips

Me in 2013 with tostitos, Goldfish, and two bags of potato chips

A few years ago, eating healthy food and spending time preparing meals used to be my absolute last priority. I was the definition of a junk food vegetarian, subsisting almost entirely on cheese flavored crackers, frozen pizza, and boxed mac and cheese. I was anxious, depressed, and I hardly had an appetite so I didn't think about my food choices at all and thought that spending money on food was a waste. I'd actually do the majority of my grocery shopping in the frozen/processed section of the dollar store, and only visit the grocery store when I needed to buy kale... for my rabbit. 

I was tired all the time, my BMI was dangerously low, and I felt like I had to wear makeup every day because my skin was constantly breaking out, but I thought that because I was thin it didn't matter what I ate. Since I've been underweight my whole life, as a teenager my pediatrician would even encourage me to binge on junk food so that I could possibly gain some weight, but what I didn't realize until I got older was that being thin does not equate with being healthy and that junk food was just as unhealthy for me as it would be for someone struggling to lose weight. 

The more I ate this way, the more I hated food. Every time I'd eat, I'd have less energy and feel a little more sick, so in an attempt to feel less sick I would eat smaller portions of the junk food, but that wasn't making me feel better either. 

I knew that I'd eventually have to learn how to cook and prepare healthy foods, and even before learning anything about nutrition I instinctively knew that whole fruits and vegetables were the magical foods that I needed to be eating more of- the problem was that they just didn't taste that good to me and I had no idea how to prepare them. It took a lot of daily practice and about one full year of cooking every day before I felt comfortable in the kitchen. 

2018-05-01 06.12.50 1.jpg

1. Allow yourself to spend a lot of time in the kitchen at first.

When I first started learning how to prepare whole unprocessed plant foods, chopping a sweet potato was terrifying. I had rarely used kitchen knives before and since I didn't have the skills, the process of preparing these foods went by painfully slowly. It would take me fifteen minutes to chop a single vegetable and after all that time spent chopping, I wouldn't even know how to flavor it so I'd end up with something that tasted bland, boring and seemingly not worth the effort. Overtime though I got a little faster at chopping and tried many recipes which taught me how to use different spices and flavors to make the food actually taste good.

I realized that a big part of what held me back from learning how to cook was the frustration I had with myself for not knowing my way around a kitchen. When I decided that eating healthy foods was going to be a priority, I had to remind myself every day that it's okay to be a slow and unexperienced cook and that the only way I'd ever get better was if I prepared food every day, several times a day, until it became easier. 

After about a year of cooking every meal from scratch, chopping seven different kinds of vegetables for a soup became no big deal. I'm glad I took it slow while I was learning because now I have the confidence to use big sharp knives and to work a little faster-and I kept all my fingers in the process! It's more than okay to work slowly and make mistakes, it's a necessary part of the learning process and it gets so much easier with practice.

2. Pay attention to how you are feeling after each meal.

My "Dinner" in 2013- It's been almost 4 years now since I last had alcohol and 3 years cheese-free

My "Dinner" in 2013- It's been almost 4 years now since I last had alcohol and 3 years cheese-free

Making the choice to chop a bunch of vegetables for a salad or soup instead of having a frozen pizza might seem like an incredible feat of willpower and discipline, but there's no force involved when I make the choice to eat healthy foods. This is because I actually don't want or crave junk food anymore and the idea of eating highly processed foods is entirely unappealing to me these days. Here's how I got there-

Around the time that I got into making healthier food choices, I was also learning about managing my anxiety and depression through the practice of bringing my focus back to the present moment and letting myself experience the feelings I had been running away from. Along with letting myself face difficult emotions, I was also being more present with the physical sensations in my body including the way my body felt after I'd eat certain foods.

When I first went vegan I ate a lot of oil-based faux cheese and plant based meat substitutes, but after eating them I'd take a moment to check in and see how they were affecting me. I realized that when I'd have poor digestion or skin breakouts, it directly correlated to what I had been eating. On the other hand, the more whole plant foods I ate the better I felt. 

After making a conscious effort to notice how these foods were making me feel, eventually when I saw a bag of potato chips or vegan cheese crackers at the grocery store, I didn't see it as food anymore. Real food became the colorful fresh items in the produce section, which gave me energy and lifted my mood, not the stuff with ingredient labels that made me feel low and clouded my head.

Don't expect to stop craving junk food overnight, but when you do occasionally have processed junk food just take the time to check in and see how it's affecting you. After making it a habit to pay attention to how each meal affects how you feel, it gets much easier to make the healthy choice. 

Our gut bacteria, which communicate directly to our brain, will cause us to crave more of whichever foods we're currently eating, so after a few weeks of consistently eating unprocessed whole plant foods, you'll find yourself craving a nice bean soup instead of something processed. Alternately, if you were eating healthy foods but then decide to have a bag of chips, for the next few days you'll likely spend a lot of time craving more chips and will find it harder to make the healthier choice again. This is why complete abstinence from these factory made food products is the most effective strategy for longterm healthy eating habits. 

Instead of this...

Instead of this...

Prepare This!

Prepare This!

3. Find healthy whole food alternatives for all of your favorite comfort foods.

No cow's cheese, vegan cheese, or nuts required to make this creamy cauliflower-based sauce!

No cow's cheese, vegan cheese, or nuts required to make this creamy cauliflower-based sauce!

Ever since I can remember mac and cheese was my #1 favorite food. Growing up as a vegetarian in a house of meat-eaters meant that I always had to have my own separate meal, so to make things easier I ate a lot of frozen veggie burgers and boxed mac and cheese. I always had some vegetables on the side, but only if they were covered in a cheese sauce. Needless to say, giving up cheese was bound to be a difficult process for me. When I went vegan and learned about what happens to dairy cows and their babies I stopped eating all dairy products including cheese overnight, but my cravings for heavy, creamy foods continued. 

At first I curbed my cravings with processed vegan cheeses, then when I got confident enough in the kitchen I started making my own cheese sauces from soaked cashews and almonds. Most of the vegan mac and cheese recipes I found called for a whole cup or more of nuts, and I was finding that while these sauces were so heavy and delicious, I would break out after eating too much of them and they didn't make me feel my best, so I started lowering the amount of nuts in the cheese sauce recipes and I experimented with making my sauce bases from mostly vegetables instead. 

I was surprised to find that these vegetable-based homemade sauces were just as good if not better than the ones that contained mainly cashews! I developed cheese sauce recipes made from sweet potatoes, butternut squash, and even cauliflower, all of which taste creamy and delicious with very few nuts or seeds needed. While the processed vegan cheeses will definitely taste more like cow's cheese, these savory creamy sauces made from vegetables are just as satisfying in their own way, and the best part is how great I feel after eating them. 


Making the decision to fuel myself with nutrient-dense whole plant foods is the best decision I ever made and sticking to it has been easier than I'd ever imagined it could be.

Patience with yourself while learning how to prepare these foods, paying attention to how you feel after eating, and finding healthy alternatives to your favorite recipes will make the process fun and not feel like such a chore. Take things day by day and overtime you'll find that no willpower is required anymore and you'll naturally gravitate towards the foods that your body really needs.

I hope you found these tips helpful and I'll be back with more healthy recipes and tips very soon! ❁

Sweet Potato Breakfast Toast (SOS-free!)

Violet attempting to steal a strawberry

Violet attempting to steal a strawberry


Have you ever heard of slicing a sweet potato into bread slice shaped pieces and toasting it? I know It doesn't sound like it would be all that life changing, but ever since I started doing this I eat so many more sweet potatoes and way less bread than ever before! 

I still love a nice toasted slice of whole grain bread, and while bread certainly isn't bad for you, especially when whole grains are involved, bread is still a processed food and processed foods are almost always less healthy than plant foods in their whole, unprocessed form.

I've noticed that I don't feel my best when I eat too much bread or any other processed food and I don't have quite as much energy as when I eat whole foods like sweet potatoes. So for the past couple of weeks I've switched out toast or oatmeal in the morning for baked sweet potato slices and I feel better than ever and stay full for longer as well. I love choosing different combinations of toppings and find myself looking forward to breakfast more than any other meal of the day. 

While sweet potato toast won't replace your sandwich bread and the natural sweetness of the potatoes is sometimes questionable with savory toppings, I find it to be the perfect vehicle for sweet toppings like nut butters, dairy-free yogurt, berries, and other fruits. 

2018-04-24 11.54.34 1.jpg

The sweet potato slices become perfectly crispy on the outside but the inside stays soft and gets super sweet.

With oatmeal, I always have to add a little maple syrup or coconut sugar, but I don't find that I need to add any sweetener to this breakfast besides fruit and it still tastes like a dessert. Actually this recipe is completely salt, oil, and sugar-free, aka SOS-free!

There are several ways in which you can make sweet potato toast, but however you make it, be sure to eat it right after it's been cooked. If it sits out for too long after you toast it, it will be a little soggy and floppy- not at all how the sweet potato toast experience is meant to be. They won't have that same quality that makes them so delicious unless you heat them back up again in the oven or toaster until crispy.

Luckily there are many options, even a make-ahead option, that will make sweet potato toast so quick and easy that it becomes your new favorite breakfast. 

IMGL8259.JPG

Tips & Tricks

  • When picking out sweet potatoes at the store, choose ones that are a bit wide and round. While long skinny potatoes will still work, I find that I can cram more toppings on a wider slice. 
  • When it comes time to slice the potato, make sure the large knife you are using is freshly sharpened. Then slice off a very small piece of the potato in the spot where you want it to be balanced while you cut. This will give it some stability so the potato doesn't roll while you're cutting into it.
  • Then, carefully slice it the long way into 1/4-1/2 inch thick slices. It's unlikely that all your pieces will be uniform in size and that's okay, just do your best and as long as they're somewhere near that size range you're good to go! 
2018-04-19 03.20.33 3 (1).jpg

Cooking Options

Once you have your sweet potato sliced into 1/4-1/2 inch thick slices, there are a few different ways you can choose to make it into toast.

Here are a few that I've tried and tested-

Oven:

  1. Preheat oven to 400℉.
  2. Place slices on a wire rack or on a parchment paper lined baking sheet. Bake for 20-22 minutes until the slices are lightly golden on the outside and the edges are just starting to brown. Flip them over halfway through cooking time for slightly more even crisping. Enjoy right away.

Air-fryer:

This is my favorite way to make sweet potato toast because there's no waiting for the oven to preheat and I don't even have to flip the slices over because the air fryer does such an amazingly even cooking job.

  1. Place the raw sweet potato slices in the air fryer basket and cook for 18-20 minutes 390℉ or whatever setting your air fryer has for potatoes/fries. 
  2. Add toppings and serve immediately after they come out of the air fryer. 

Toaster or Toaster Oven:

Yes, believe it or not you actually can put raw sweet potato in the toaster to make sweet potato toast, but it's probably not the most efficient way to do it. You would have to stand at the toaster for a long time while you keep checking on it to make sure it doesn't burn and end up putting it through a toast cycle several times before it's done.

This might not be the best thing for your toaster too as sweet potatoes can get a little sticky sometimes. So if you do want to try this method, it's best to cook the sweet potatoes in the oven first, then store them in the fridge and toss them in the toaster or toaster oven right before you eat them. 

  1. Preheat oven to 400℉.
  2. Place slices on a wire rack or on a parchment paper lined baking sheet. Bake for 15 minutes or until potatoes are tender but not fully cooked.
  3. Remove pan from oven and allow potatoes to cool completely before transferring to storage container. Store in the fridge for up to 5 days.
  4. When you want sweet potato toast, grab a precooked slice from the fridge and put it in your toaster or toaster oven until it's crispy and golden on the outside, then enjoy right away. 
2018-04-21 10.30.51 1.jpg
2018-04-21 12.22.38 2.jpg

My Favorite Toppings

  • Nut or seed butter- (pecan, walnut, almond, cashew, sunflower etc.) I like to buy raw nuts in bulk and make nut butter myself in the food processor and always have a jar of it in the fridge. 
  • Dairy-free yogurt- ideally sugar-free, unsweetened, minimal ingredients. My favorite brand is Forager cashew yogurt, but coconut or almond yogurt can be great as well! 
  • Hemp seeds or ground flax seeds- I add these in for omega 3s when I'm using any nut butter that is high in omega 6, such as pecan, almond and cashew. When I make walnut butter which is super high in omega-3s I leave the omega-ratio-balancing seeds off.
  • Bananas- available all year & perfect for when other fruits are out of season
  • Berries- blueberries, strawberries, blackberries, raspberries, etc.
  • Other seasonal fruit- figs, plums, peaches, etc. 
  • Cinnamon- cloves and nutmeg also pair well with certain fruits like apples and pears

If you decide to try making sweet potato toast, let me know what you think of it and also what cooking method and toppings you chose to use! ☼

Pros and Cons of Living in an Airstream Trailer After One Year

as1.jpg

Our Airstream Journey:

In January of 2017, we moved out of our studio apartment in Manhattan and into an Airstream travel trailer to live in full time while we relocated to Washington state. We spent our first month in the Airstream traveling, parking at a different campsite nearly every night while we slowly made our way across the country, covering roughly 5000 miles in total.

We started at the Airstream dealership, Colonial Airstream in New Jersey, and headed south through Virginia and Tennessee and then started moving westward through Texas, New Mexico and Arizona, all before going north again up through California and Oregon and eventually arriving at our final destination near Seattle, Washington.

Camping in Monahans Sandhills State Park in Texas

Camping in Monahans Sandhills State Park in Texas

It was this long trip that made us fall in love with this lifestyle. Living in a travel trailer gave us the freedom to all travel together, our rabbit included, and have adventures in amazing new places every day, but still be able to come back to a place that felt like home. 

One we arrived in Seattle, we found a long term parking spot where we have lived in the trailer for the past year. While we loved traveling, Anthony's job is in Seattle, so after our month long adventure moving here we knew we were going to have to enjoy a more stationary life in the Airstream. 

In all of our "What Could Go Wrong?" lists and planning we had made before we began our Airstream adventure, we fully expected most of the problems to arise during the month of travel and figured that once we arrived at our final location it would be smooth sailing from there. Surprisingly, it was just the opposite.

While we travelled, everything worked out almost perfectly, there were no major issues to report all throughout our trip, and when we arrived in Seattle we were so relieved to start living in the trailer in a fixed location. It started feeling like an actual home and we were able to start a garden and see a different, maybe slightly less adventurous part Airstream living. Little did we know, this is when the real adventures and lessons would begin. 


What We Didn't Love about Living in the Airstream:

I'm going to start with the cons or the negative experiences we had while living in our Airstream so that we can end on a positive note. It doesn't feel right to even say anything bad at all about our experience because overall, we loved it and would do it over again in a heartbeat, but I think some of what we experienced, the good and the bad, could be helpful if this is a lifestyle you're interested in and want to hear about the full spectrum of experiences we had.

2018-04-05 10.23.48 1.jpg

The Small Stuff:

These are just the little minor inconveniences we don't hear mentioned too often about what it's really like to live in an Airstream full-time.

  • When you first move in, expect lots of small injuries. The process of adapting to a smaller space involves a lot more cuts, bangs and bruises than we had anticipated. Whether it's bumping your head on the light fixtures or smashing your elbow coming too quickly around a sharp corner, expect to get a little beat up while you form that muscle memory that eventually guides you more smoothly through your new space.

  • Metal riveted walls look beautiful, but they can and they will eventually cut you. Every single time I wiped down the walls especially around the kitchen, I'd get cuts from the sharp edges of the metal. It's not jagged metal or anything, but it's blade-sharp metal that leaves thin, fast-healing cuts. Obviously still not ideal, but just something to be aware of when polishing those shiny walls.

  • I managed to overdraw on power almost daily and we had 50 amp hookups. This wasn't such an issue when we were travelling, but once we were parked for good and we got out the rice cooker, blender, and several more kitchen appliances, the limits of 50 amp power became much more pronounced.

  • The layout of an Airstream is designed for travel and adventures, not for being parked in the same spot for a year like a stationary home. While we enjoyed our time in that one spot, we found ourselves not going out as much as when we were travelling and through staying inside a lot the furniture seemed to get less and less comfortable everyday. This is no fault of the Airstream, but just a sign that if we weren't going to be using the trailer for travel anymore like it was intended, we would have to make some modifications for it suit our needs.


The time someone tried to break in at 2 a.m.

Our long term parking spot was located in the town of Bothell, a rapidly growing suburb of Seattle, which had always felt like a pretty safe place to be. We lived near an RV park, but a little out of the way in one of their long-term spots on a hill top surrounded by a beautiful meadow and lots of tall trees. We had two other RV neighbors, but they both had homes and only stayed in their RVs during the work week, so we were usually all alone on the weekends. 

One rainy Saturday night in November of 2017, we awoke to some strange sounds coming from the outside of our trailer. It sounded like someone or something climbing on the Airstream and then we thought we heard someone try to open the door as well, which was locked. We turned on the lights and tried to figure out what was going on and that's when we heard yelling. Anthony looked out the window to try to see who it was and that's when he saw a man standing on top of the trailer next to ours smashing his foot through their roof vent. Immediately he called 911. 

IMG_20171126_034108.jpg

Five minutes later a police officer arrived and then shortly after several more police officers showed up. They told us they believed someone was inside our neighbor's trailer. We told them no one was supposed to be in there because the family that lives there goes home on the weekends. They surrounded the trailer, guns drawn, and yelled through the megaphone urging the occupant to come out of the trailer several times. Eventually they pried off the door and sent in a police dog followed by several officers. What happened next was the craziest thing I've ever seen. 

Out of the trailer came the dog and multiple officers escorting out a completely naked man in handcuffs with pupils the size of dinner plates. All of the officers cheered-- they seemed very happy to have caught the perpetrator and that no one was hurt. They tried to get him to sit down but it was apparent that he had consumed a lot of meth and was covered in injection wounds. They kept trying to give him a blanket to cover up with but he threw it on the ground repeatedly, determined to stay completely naked. 

The cops later told us that he admitted to leading them on a high speed car chase earlier that night, ditched his jeep at a local auto shop and took off running before ending up on our hilltop where he was trying to find a place to hide out. He was trying to get into our trailer, but since it's rounded and it was raining, he wasn't able to get onto the roof. He must've heard us wake up and that's when he started yelling before climbing up the ladder on our neighbors trailer, which has a flat roof, and found it much easier to get inside. While he was inside our neighbors trailer he took off all his clothes, did some more meth, drank their milk, and relaxed in their bed. It didn't seem like he was there to steal anything, but more like he was just really high on meth and didn't know what was going on anymore. He kept telling the police they'd need to buy him a new door for his trailer. 

The owners of the trailer showed up a few hours later and were very fortunate that they, and their two small children, weren't home when this guy came crashing through their bathroom ceiling vent. He was arrested for vehicle prowling and spent a night in jail before being released with a pending court date. 

After this terrifying experience, it really began to sink in for us that while our trailer felt like a home, we were actually living in a vehicle, which means we don’t have the same legal protections as if we were living in a house. We still felt fairly safe knowing that our Airstream was more difficult to break into than other trailers, and if anything this put the Airstream through an interesting safety test, but the reality of what could've happened that night gave us a lot to consider about staying safe while living in an RV. Since this incident we have taken several more self-defense and safety measures. 


The time a tree almost fell on our trailer:

Earlier in March of 2018, A powerful windstorm brought down a giant Douglas fir tree which landed right next to our trailer while we were home. This was caused by the seven acres of forest being cleared next to us, so this tree was exposed to high winds it was never meant to endure. This was the second major close call to happen to us in that spot, and we didn't want to wait around for the third strike. 

While we wanted to keep the trailer, we didn't have anywhere else we could park it. The land we purchased last summer doesn't have a septic or running water yet, so we couldn't take it out there, and all of the RV parks in our area aside from the one we were staying at would be a very far drive from Anthony's work. This is why we made the sudden decision to move out and sell our trailer.

For the full story check out my post here

2018-03-09 08.35.35 1.jpg

What We Loved about Living in the Airstream:

Overall, we loved our experience of living in an Airstream travel trailer. While our time spent traveling and staying at a new campsite every night was by far the best part of the lifestyle, it was still an amazing experience to live in the Airstream in a fixed location. It really began to feel like home.

Here's some of our favorite things about living in the Airstream-

2018-01-02 07.42.00 1.jpg
  • We expected with our daily living and use of the trailer that eventually something would break and we'd need to take the trailer in for repairs. We figured maybe it'd be the water heater failing, or the AC breaking, but to our surprise and delight nothing major ever broke. Some minor things broke- the small round mirror in our bathroom fell off the wall during our travels and our awning arm got bent in a wind storm, but nothing major failed on us the whole year that we lived there. Airstreams are built to last and we experienced that first-hand.

  • Living in a smaller space also helped us to stay more organized. There are so many little storage nooks in creative places all over the trailer, so there was always a place for everything, and while we couldn't have tons of items fit in there, everything that we did own had a place. The small size of the place also made cleaning much easier. Vacuuming takes only a few minutes in a trailer and having less space really inspires you to keep the free space that you do have clean and tidy.

  • Since we chose the International Serenity model of Airstream, which has more windows instead of overhead storage, our space was always bright which made us feel much more connected to the outdoors.

  • The kitchen in the Airstream is in many ways better than any apartment kitchen I've ever had. The convection oven/microwave can cook anything, and some things it cooks much better than any regular oven could. The sink is super deep, which is important since there's no dishwasher, but you could tell a lot of consideration was put into these small things and it made using the Airstream kitchen daily a very pleasant experience. If you love to cook, you won't be sacrificing anything that you love about cooking while living in an Airstream.

  • We were worried that living in such a small space would start to feel cramped or restricted, but that was never our experience. There was just enough space to feel comfortable and we rarely found ourselves wishing we had more room. Even after a full year of living there and acquiring more things, we always found creative ways of storing them. We were definitely glad to have decided on the 30 ft. trailer for our full-time living situation.

  • The trailer passed an important, albeit terrifying, experience when someone tried to break in and failed. This was likely because of the round shape of the trailer which he had difficulty climbing on top of and also the secure lock on our door. I think if someone really wanted to break into anything, our trailer included, they probably could, but Airstream has done a good job of not making it the easiest thing in the world. If you are considering a trailer with a flat roof and a ladder on the back, I'd advise you to consider how that might invite in the wrong kind of company, even if you live in a safe place, that's still a big risk to take.

2018-04-24 08.09.15 1.jpg

Ultimately, we are so grateful for our time spent in the Airstream and we would go back and do it all over again if we could. It was an incredible experience which taught us a lot about ourselves and enabled us to have adventures that we'll always remember. 

2018-04-05 10.28.25 1.jpg

One day, we might get another smaller Airstream for actual traveling as opposed to living in it like a full-time home, but for now since we don't have any travel plans and are starting to settle in to living in Washington, that won't be happening anytime soon. While we wish we could have kept living in the Airstream for another year while we build our house, we know we made the right decision to part with our Airstream at this point since we were no longer traveling and taking it out for adventures.

"A ship in harbor is safe — but that is not what ships are built for.”

2018-04-24 08.03.41 1.jpg

For more information, click the button below to check out our videos documenting our travels in the Airstream on Youtube!

Roasted Garlic Quinoa Tabbouleh with Tofu Feta [Oil-free, Vegan]

2018-04-13 01.35.04 1.jpg

Tabbouleh is a kind of zesty chilled grain salad full of fresh herbs and vegetables. In this version, I used fluffy white quinoa as my grain and fresh vegetables like cucumber, cherry tomatoes, green onions, and bell pepper. For extra flavor I tossed everything in a simple but flavorful dressing made with roasted garlic, fresh lemon juice, and tahini. 

Though this dish could be served without it, the tofu feta is such a nice touch and makes this salad much more filling. I've been making a feta cheese alternative using tofu for the past few months and I feel like I finally have discovered the perfect marinade sauce. The tofu cubes end up tasting eerily similar to how I remember feta cheese tasting with just the right amount of herbs, tang, and saltiness. 

2018-04-13 01.25.37 2 (1).jpg

For the best results with the tofu feta, prepare it the day before you plant to make the tabbouleh so it has at least 8-24 hours to marinate before being added to the salad. For a firmer, more feta-like texture, freeze the block of tofu first then thaw it to release all the water or just press the water out of the tofu first using a tofu press or alternative method. This also allows the tofu to soak up more flavor before being chopped and added to the marinade. 

Once your tofu has marinated and you've cooked your quinoa, the tabbouleh comes together really quickly. Blend together the dressing, chop your fresh veggies and herbs, then toss together and let chill for at least a couple of hours in the fridge to let the flavors develop. 

This makes a perfect meal to take on the go or to add to a packed lunch. 

Recipe below!


2018-04-13 01.17.56 1.jpg

Prepare Ahead:

Herbed Tofu Feta


Tofu No-Chicken Noodle Soup with Lemon & Black Pepper [Vegan, Oil-Free, Gluten-Free]

2018-04-05 06.42.52 1.jpg

It's still cozy soup season in early April right? Here in the Pacific Northwest, although it's been a little warmer, we are still fully in the rainy season so I've been into all things cozy and comforting these days. 

Chicken noodle soup is one of those timeless classic soups that almost everyone loves. Even though I grew up as a vegetarian, I still remember enjoying cans of the Amy's no chicken noodle soup all the time. Those are great in a pinch, but nothing actually compares to a homemade soup- and this soup is so easy to make there's no excuse to go reaching for the canned stuff. 

2018-04-06 11.12.44 1.jpg
2018-04-06 11.14.54 1.jpg

The tofu "chicken" is baked in a marinade of tamari, nutritional yeast, and paprika, which makes it so savory and delicious. I recently got an air-fryer so I've been loving that for making crispy tofu, but it's just as easy and efficient to bake it in the oven for about 20 minutes. 

2018-04-05 06.45.49 1.jpg

This soup is full of zesty flavors like lemon and black pepper along with savory tofu-chicken-complementing herbs like sage, marjoram, and thyme. What brings it all together and gives it that authentic savory broth taste is the no chicken bouillon broth paste made by the brand Better Than Bouillon. It's available in most grocery stores near where they sell the broth and while the packaging says vegetarian, it's actually vegan! It's so delicious but it can be a bit high in sodium so I've listed a low-sodium option in the recipe as well. 

This recipe will please vegans and non-vegans alike! The crispy marinated tofu makes a perfect chicken substitute for even the pickiest of eaters and the broth tastes like the most classic chicken broth from your childhood, all without harming any animals.  

If you try out this recipe, I'd love to hear what you think of it! Hopefully it's exactly the soup recipe you needed to stay cozy through this rainy early spring weather. 

2018-04-05 06.53.27 1.jpg

Why We're Moving Out & Selling Our Airstream Travel Trailer

2018-03-20 11.53.45 1 (1).jpg

If you had told us one week ago that we'd be selling our Airstream travel trailer and moving back into an apartment, we wouldn't have believed it. Up until last week we couldn't see any reason to ever want to sell our trailer and move. We expected that we would live in it at least for the next year while building our house and then possibly keep it around for years to come. Then, a windstorm came and changed everything for us. 

At around 7 pm last Thursday, Anthony had just gotten home from work and was feeling very anxious about the weather. The winds were gusting upwards of 50 mph, and as we live on a hilltop in the convergent zone, the gusts can get especially intense. As the gusts grew stronger and stronger, Anthony became more concerned and couldn't do anything other than look out the windows and watch as the tall evergreen trees next to us were bending sideways.

I was trying to stay calm. We had been through worse windstorms in the trailer before and had only seen a few small branches go flying by so I figured this would be the case with this storm as well. I even started to get upset with Anthony for his fixation on the wind and inability to relax. My intuition that night was completely wrong. 

Anthony was looking out the window during a particularly huge sustained gust and watched as the giant evergreen trees next to us bent completely sideways. He yelled over to me that one was about to go down and suddenly we heard a loud crack. I screamed and covered my head, attempting to brace for the potential impact of a 200 ft. fir tree smashing through our aluminum trailer. Time slowed down and the sound of the crack felt long and slow and then we heard the booming sound of the tree hitting the ground next to our trailer.

2018-03-09 07.59.51 1.jpg

We looked outside to find that this giant tree had been completely uprooted and landed 20 ft away from us. It had taken out a couple of smaller trees on it's way down as well. We didn't want to stick around and wait for another one to fall, so we grabbed our bunny, Violet, and all got in the car to go wait out the storm in the parking lot across the street where we could watch the trees bend over our trailer from a distance.

This is the point when we began to discuss the idea of selling the trailer and moving into an apartment. 

2018-03-09 08.37.56 1.jpg
2018-03-09 08.29.16 1.jpg

Aside from our current spot, RV parks which are a reasonable distance to Anthony's work basically don't exist, so we didn't really have the option to move the trailer somewhere else. We considered staying where we are, but we were still surrounded by several more tall evergreen trees and knew we didn't want to be near them in the next wind storm.

2017-10-27 06.00.22 1.jpg

The tall trees next to our trailer were all old evergreen trees that used to be in the middle of a dense natural forest, but recently after 7 acres of forest were cleared on the lot next to us (as shown in our last video) these old trees were now being exposed to high winds that they were never meant to endure. It became clear to us after talking with the RV park staff as well as the contractor on the 7 acre lot next to us, that no one was going to be watching out for us and checking on these trees. We had to make the difficult decision to take our safety into our own hands, so we decided to sell the trailer and move.

2017-09-16 02.44.35 1.jpg

This past weekend was incredibly sad for us because we loved our life in the Airstream and it didn't feel right to end our adventure of living in it so soon, but we knew it was the right decision for us and that we needed to take our safety concerns seriously after such a close brush with what could've been a disaster. 

Our bunny Violet, adapting to our new place

Our bunny Violet, adapting to our new place

We found an apartment walking distance to Anthony's work and spent this past week moving in and adjusting to apartment life again. While this doesn't change our long-term plans, and we still plan on being in our house that we're building a year from now, no longer living in an Airstream and moving back into a city is a big adjustment for us.

There are certainly many things we have now in our apartment that we didn't have in the trailer and it definitely feels luxurious to have all of the standard amenities again, but there's still a lot we're going to miss about our life in the trailer. 

I'll be writing a post soon about all of the pros and cons of living in an Airstream travel trailer full time for more of a detailed look at what we loved and what we didn't so much love about RV life, but until then I just wanted to post this update for anyone who was curious to know why we made such a sudden change.

We'll be continuing to make videos and share our experiences with our next adventure of building our house which hopfully will be starting in the fall.

Complete Guide to Cooking Without Oil

Coronary angiograms of the distal left anterior descending artery before (left) and after (right) 32 months of a plant-based diet without cholesterol-lowering medication, showing profound improvement. (source)

Coronary angiograms of the distal left anterior descending artery before (left) and after (right) 32 months of a plant-based diet without cholesterol-lowering medication, showing profound improvement. (source)

Oils, like any other food, aren't either good for you or bad for you, they're simply better or worse for you when compared to other foods. Oils shouldn't be avoided because they're a "bad foodand it's true that certain oils like extra virgin olive oil are certainly less bad for you than than other oils like coconut, corn, and palm. Even so, it's important to keep in mind that less damage is still damage.

From a health perspective, there's no reason to include oil in our diets. Most of us have about 2200-2500 calories in our calorie bank for the day, so it doesn't make sense to eat a highly refined, calorically dense food product, when instead we could be spending those calories on whole, unprocessed plant foods, which provide necessary fiber and nutrients. 

For the most part, I don't use any oil in my home cooking, and ever since learning to use the right substitutions and methods I don't find myself missing it at all. Lately, I rarely seek out specifically oil-free recipes since it's become easy enough to make any recipe I find without any oil. 

A few reasons to avoid oil:

  • Within hours of ingesting any kind of oil arteries stiffen and their ability to dilate is impaired.

  • The Mediterranean Diet is healthy in spite of olive oil- not because of it. The lowered heart attack risk on this diet is due to the high consumption of whole plant foods rather than the addition of olive oil.

  • The plaque that builds up in our arteries causing arterial lesions and blockages can only be cleared up by reducing total fat intake, not by choosing different "better" kinds of fats.

  • By age 10, almost all kids have fatty streaks in their arteries which is the first sign of atherosclerosis, the leading cause of death in the United States. So most of us should be eating for the purpose of reversing the heart disease that we likely already have.


How to cook without oil on the stovetop:

2018-02-27 05.11.15 1.jpg
  • Use nontoxic, nonstick cookware made of stainless steel, enamel-coated cast iron, or ceramic titanium.

  • Instead of frying vegetables in oil, use small amounts of vegetable broth, water, vinegar, or tamari/coconut aminos to keep things from sticking to the pan.

  • The key to this method is to add whichever liquid you're choosing a few teaspoons at a time. Just enough to release some steam and keep things from getting stuck to the pan, but not so much that the vegetables are sitting in a puddle. The pan should be hot enough that the liquid you add boils away somewhat quickly, but never turn the heat higher than medium-high to protect your pan from heat damage. Once it boils away completely, add another very small splash of liquid and stir things around to free them up again. Repeat this process until your food is fully cooked.

  • Note that things won't always brown as much when using this method vs. when using oil. If want to something to brown or char slightly, let all of the liquid evaporate from the pan, or don't use any liquid in the first place, then let the food cook in the dry pan while watching carefully to see when it browns. Once it browns, you can add a very small amount liquid to the pan stop it from overcooking and burning or remove it from the pan entirely depending on the recipe.

  • Consider the temperature of the pan. Too much liquid added in during cooking time will cool down the pan and greatly slow down the cooking speed, so be sure to add as little as possible. Or if you accidentally add too much, adjust the temperature so it can boil again and evaporate away.


How to bake without oil:

muffin2.jpg
  • For baking, I like to use silicone cookware. It's nontoxic and the flexibility of it allows baked goods to just pop right out, no greasing the pan needed. Silicone bakeware will require that you increase the baking time, usually about by 3-6 minutes, depending on the recipe.

  • Some baked dessert recipes call for cups full of oil. When this happens there are many options for replacements: nut butters, dairy-free yogurts, applesauce, sweet potato or squash puree, pureed prunes or dates, or mashed banana.

  • When choosing an oil replacement in baking, take into consideration the recipe you're making and try to discern what the oil is being used for in that specific case (to add moisture, to add structure, etc.) . Be sure to also choose a replacement with a flavor or texture that would best suit that particular recipe.

  • This sometimes takes a bit of trial and error, but after a few attempts you'll find what works best for any given recipe.


How to roast without oil: 

squash1.jpg
  • Instead of greasing the baking sheet, use a silpat or parchment paper to keep the pan lean and the veggies from sticking

  • Use another liquid to get the spices to stick to what you're roasting such as water, vegetable broth, tamari, maple syrup, mustard, vinegar, etc. depending on the recipe (full list down below).

  • If you have a spray bottle, it can really help to use that to mist water or liquid of choice on to the vegetables you're roasting, then toss to coat with seasonings.

  • Oil-free roasted veggies can dry out, but to avoid this as much as possible roast them low and slow

  • To achieve a shiny glaze on the surface of the vegetable without any oil, brush on some aquafaba, the cooking broth leftover from cooking beans.

  • Give them some room to breathe and don't overcrowd the pan- this should help them to get more brown and crispy.

  • Another trick to get your veggies to brown more is to use a glass baking dish with no parchment paper at all, just place the chopped veggies right on the glass. This will help them to get slightly more brown than if you used parchment paper.

  • Make sure to chop everything you plan to bake in chunks that are pretty much the same exact size to prevent uneven cooking.

  • Stir the roasted vegetables around a bit after about 10 minutes of cooking to ensure they don't get stuck to the pan if you're not using parchment paper or other non-stick surface. This will also help them to cook evenly.


Deep Frying Alternatives

My favorite kitchen appliance by far is my Air Fryer

It makes any whole plant food I put in there turn into the most crunchy and evenly crispy treat, all with no oil needed! 

It's very easy to use and clean, and the best part about it is you don't have to wait for it to preheat.

This device has greatly cut down on the amount of time I spend in the kitchen and it makes the best crispy tofu I've ever had.

While it's not necessary to have an air fryer to eat an oil-free diet, it certainly makes it a lot easier!  

2018-06-05 12.35.24 1.jpg

What to Use Instead of Oil

I mentioned previously that I like to use a glass spray bottle to evenly spritz my roasted veggies with liquid. While this isn't necessary, I find that it makes it much easier to lightly coat the veggies with a liquid instead of using oil. 

2018-06-05 04.46.06 1.jpg

While these liquid oil-substitutes wont prevent stuff from sticking to the pan (that's what parchment paper is for!) and they will evaporate over the cooking time, they still add in a bit of moisture to help prevent things from drying out while roasting and impart a really nice flavor.

It's also been nice to have a reason to save my cooking broth rather than pour it down the drain, especially when I make a nice salty broth and use lots of flavorful fresh herbs. These cooking liquids are so much more flavorful than most oils. 

Here are some of my favorite oil-alternatives for roasting veggies:

  • Tamari (low-sodium)

  • Coconut aminos

  • Vegetable broth

  • Leftover cooking broth, the one I'm using now is leftover from cooking white beans and thyme

  • Vinegar, such as apple cider vinegar or balsamic

  • Leftover liquid from steaming vegetables, a.k.a. pot liquor such as from steamed beets, potatoes, greens, etc.

2018-06-05 04.43.05 1.jpg

Those are all of my best tips for cooking without oil! Hopefully you've found these tips helpful and can start to cook oil-free with confidence. 

It will definitely take some time and experimentation to get it right the first few times you try this but after a while it will become much more intuitive. Expect a little trial and error in the learning process. Cooking without oil isn't the easiest thing- my partner calls it cooking on hard-mode, and that's exactly what it feels like initially, but once you get the hang of it you'll have a valuable skill that could actually improve the quality of your life and your long-term overall health. 

Notice: This blog post contains affiliate links, which simply means that I earn a commission if you purchase through those links, but your price remains the same. Thank you for your continued support! 

Balsamic Borscht- Beet & Cabbage Soup

2018-03-05 05.07.43 2.jpg

This vibrant red beet soup is packed full of nutritious whole plant foods and cooked with flavorful mustard and a splash of balsamic vinegar. The beets are peeled and become very sweet when cooked, so there's no earthy taste here! Just sweet, tangy, wholesome goodness. 

This soup contains a variety of some of the healthiest whole plant foods possible, including beets, potatoes, carrots, purple cabbage, leeks, garlic, and fresh herbs. Despite this soup being such a healthy meal, you wouldn't guess that from the way it tastes. It's lightly sweet from the beets and gets a delicious tangy flavor from the balsamic vinegar which is added in at the very end. 

2018-03-06 07.12.38 1.jpg

This recipe is fairly easy, but be warned- there's a lot to chop!

Sometimes it helps to put on a podcast to listen to in the background, but lately I try to use the time spent chopping as an opportunity to tune in and be more present with what I'm doing. It's a great time to slow down and feel grounded while preparing myself a truly nourishing meal. 

2018-03-05 08.10.00 1.jpg

Once everything is chopped and the cooking has commenced, I like to whip up a quick cashew sour cream. My favorite vegan sour cream recipe is this recipe by Hot For Food. While this soup is fantastic with or without sour cream, it's so easy to make that I usually find it worth the small amount of effort. 

2018-03-06 07.15.47 1.jpg

If you've been following my blog since the beginning, you may remember that one of my very first recipes was a for a borscht soup! Since then, my recipe has changed a bit with the addition of the balsamic vinegar and getting really specific on the exact measurements after making this countless more times since then. 

Over the years this has become one of my all-time favorite recipes and one that I've been really excited to update and share with you so that you can try it out for yourself. As good as it tastes, the way it makes you feel is the best part! I hope you enjoy the recipe, and if you do feel free to let me know what you think of it by leaving a comment down below.  


Oil-Free Veggie Fried Rice with Peanut Sauce

2018-03-01 01.33.43 1.jpg

Lately, I've been loving this rice and veggie stir-fry. Fried rice was a dish I was pretty sure I would never be able to make taste just as good without oil, but with the right sauce it's actually very possible!

Instead of oil, we fry the vegetables in coconut aminos which adds a wonderful umami flavor. Then the cooked rice is added in along with a savory peanut sauce which makes this dish taste rich without needing any refined oil. 

For this recipe, you can use any kind of whole grain rice you like. I've used wild rice, black rice, brown rice, and even quinoa- all with fantastic results. I think black rice is probably my favorite though, and it's actually the highest in antioxidants too!

Whichever rice or other similar whole grain that you decide to use, the first step is to give it a good rinse and then cook it in your rice cooker. 

IMGL5856.JPG

While the rice is cooking, prepare your veggies. You can use 2-3 cups of whichever finely chopped vegetables you prefer. I usually go for a mix of bell pepper, carrots, broccoli/broccolini, and edamame or peas.

While the variety of those veggies changes a bit each time I make it, I always use chopped green onions and garlic to add more flavor and give it a more authentic restaurant-style fried rice taste.

rice3.jpg

Once you have your veggies chopped, it's time to make the sauce. 

My favorite stir-fry sauce is this spicy & savory peanut sauce. It's a simple mix of coconut aminos (or use low-sodium tamari), peanut butter, hot sauce, and maple syrup. There's no blending required- simply add the ingredients into a small bowl and give it a good stir until creamy. 

IMGL5844.JPG

Now on to the oil-free vegetable frying-

To make the veggies extra savory and avoid having them be soggy, I like to use just a 1/2 tablespoon of coconut aminos in place of oil. 

Once the pan is hot, add the coconut aminos and garlic, cook for a few minutes then and the rest of the veggies. Since they are chopped small, they cook in about 5 minutes. Then, add in the cooked rice followed by the sauce. Stir it all together while the rice cooks with the veggies for another 2-3 minutes. Then add in the green onions at the very end, remove from heat and serve. 

2018-03-01 01.37.05 2.jpg

Let me know if you try out this easy oil-free veggie fried rice recipe, I'd love to hear what you think of it!


Tempeh Bacon, Lettuce & Tomato Wrap [Vegan BLT]

2018-02-15 05.30.22 1.jpg

This marinated tempeh & veggie wrap has been one of my favorite quick lunch recipes all week. Ever since getting the hang of preparing tempeh, I've been all about adding it to wraps, sandwiches, salads, and stir-frys. 

The trick with cooking tempeh is either steaming it or water-frying for about 8-10 minutes before marinating it. This removes any bitter fermented flavors from the tempeh and allows it to easily take on the flavors of the marinade. 

tlt22.jpg

There are so many different ways to marinate and prepare tempeh, but for tempeh in a wrap I like to stick with a simple marinade consisting of coconut aminos (or tamari) maple syrup, and balsamic vinegar. Sometimes I also use just a bit of liquid smoke for a different flavor, but it's not entirely necessary and can be omitted. 

The longer you allow the tempeh to marinate (up to 24 hours), the better the flavor will be, but I'm one of those people who never remembers to plan ahead and I usually decide to cook something on a whim, which means often I manage to only marinate the tempeh for anywhere between 15-30 minutes, and it still takes on plenty of flavor in that amount of time.

Once the tempeh has marinated, you can either bake it in the oven or fry it in a pan on the stovetop for a few minutes on each side. I usually go with the baking option so I can cook all of the pieces at the same time. 

tlt33.jpg

The firm and crispy texture of the tempeh makes it fantastic as a bacon substitute in this BLT style wrap. The marinade is just the right balance of salty, tangy and sweet and makes the tempeh taste savory and delicious. 

I used a spring mix lettuce blend, fresh tomatoes, green onions, avocado with lime juice, and I added shredded carrots for some extra crunch, though finely chopped purple cabbage would well work in place of the carrots too. 

I find that when making a wrap it's important to use a spread of some sort because it helps to hold the wrap together when you're rolling it all up. There are a few different options for the spread to use in this wrap.

This week I've been going back and forth between using this homemade green olive hummus and this homemade pumpkin seed pesto sauce. They are both easy to whip up in the blender in about 5 minutes, but for more classic BLT and less preparation, use a vegan mayo spread.

Let me know if you try this out, I'd love to hear what you think of the recipe!


5-Ingredient Matcha Coconut Crispy Bars [Refined Sugar-Free, Gluten-Free, Vegan]

matchafinal.jpg

These crispy matcha coconut bars contain only FIVE ingredients and require almost no cooking! The only part of the recipe that comes close to cooking is softening the coconut butter, which can be done on the stovetop but it will also soften up in just 20-30 seconds in the microwave. 

Next you simply mix all of the remaining ingredients together in a bowl and then press the mixture into a dish. Let it cool in the fridge for at least an hour, then slice and serve. It doesn't get any easier than this!

Here are the 5 ingredients you'll need:

  • coconut butter
  • maple syrup
  • vanilla extract
  • matcha powder (optional)
  • brown crisped rice cereal, preferably one-ingredient and sugar free

While I wouldn't consider coconut butter to be a health food and it's definitely more of a special occasion sort of treat, I still consider it to be a healthier alternative to coconut oil. 

One tablespoon of coconut butter provides 2 grams of fiber as well as small amounts of potassium, magnesium, and iron. Meanwhile, coconut oil has had everything good removed including all of the fiber and micronutrients so you're left with 100% refined saturated fat. Coconut butter is much closer to being in its whole food form and still provides some nutrients, so I feel comfortable using it on rare occasions and especially when cooking for others who enjoy a rich dessert or are curious to try vegan food.

Recipe below!

matchafinl2.jpg

Flax Crackers & Green Olive Hummus [Oil-Free, Vegan]

0 (2).jpeg

Sometimes you just need a good salty, crunchy snack, but store bought crackers often contain questionable ingredients and preservatives. For the longest time, I put off making my own healthy crackers because I thought it would be impossible to make crackers without oil and flour, two ingredients which I avoid using often in my home cooking.

One day, I finally stopped doubting myself and experimented with making a flax and almond based cracker and to my surprise it turned out crunchy and delicious.

I haven't had to buy crackers from the store ever since!

My favorite way to enjoy these crackers lately is to dip them in hummus and lately my favorite hummus flavor has been roasted garlic and green olive.

The hummus is super simple to make and it blends up very easily. I get kind of frustrated when I make a hummus recipe which requires a lot of scraping down the sides of the blender and is so thick that the blades get stuck.

The trick for a good fluffy hummus, is to save some of the brine from the can of chickpeas and use that in the mixture to achieve a whipped texture. This also makes the blending process much easier and faster. 

hummusolive.jpg

This recipe makes roughly 16 oz. of hummus which fits perfectly in a mason jar! The hummus will last for up to a week when stored in a sealed container in the fridge.


Life in the Airstream Update & Lots of Cute Wild Animals Are Visiting!

2018-02-13 02.20.02 1.jpg

For the past year, I've been living fulltime in a 30 ft. Airstream travel trailer in Washington with my partner, Anthony, and our dwarf rabbit, Violet. When we made the decision to leave our apartment in New York City and move across the country to Washington, we decided that the best way for all of us to get there would be in an RV and that we would continue to live in the RV while we look for land and eventually build a house. 

Over the summer, we found and purchased 7 acres of beautiful forested land and are now currently in the final stages of designing the house and getting ready to start the long process of applying for building permits. Since it's been quite cold here these past few months, we haven't been spending as much time out at the property, so we've mostly been inside the trailer working on making some of the big decisions that come along with building a house. 

meinforest1.jpg

After a full year of living in our trailer, we are so happy with the decision we made. While the space is pretty small, the amount of windows and skylights makes it feel much more open. There's definitely not enough room in here to have everything we want, but it's been a good lesson in living more minimally and being careful to not accumulate stuff that we don't absolutely need. 

That being said, there have been certain non-essential items that we have been accumulating recently which have brought us a lot of joy and entertainment- mainly our bird feeders, of which we now have four or maybe even five... I've lost count. 

2017-12-25 08.55.25 1_3.jpg

Most of them are the kind that suction right to the window so we can creep on the birds as they feast on their seeds. We have one on the kitchen window so I can watch the birds as I do the dishes and cook, but we also have a lot of them around our bedroom as well and it's the best thing to wake up to see beautiful birds at the window every morning.

It's been so much fun to see the variety of birds that come by and to try to identify them. After a few months of feeding them, they've started growing their families and because of this we've also been getting more visits from big predatory birds like owls and eagles, but we don't have any pictures of those big guys unfortunately. 

Over the past few weeks we've been taking lots of pictures and videos, and we've especially been enjoying the short animated gifs that are made automatically on our phones, so i thought I'd share a few here!

This pretty bird is called a Northern Flicker:

2018-02-03 03.00.08 1.jpg
2018-02-02 05.49.10 1_2 (1).jpg

He's a type of woodpecker and one of the loudest visitors to our feeder because he likes to use his long beak to peck at the seeds and send them flying everywhere. 

ezgif.com-video-to-gif (3).gif
ezgif.com-video-to-gif (4).gif

Another bird who's been visiting lately is the vibrant blue Stellar's Jay. They usually come in pairs or small groups and have such a pretty bird song.

2018-02-08 10.06.43 1_2 (1).jpg

All too often though, our most common visitors have been the squirrels. No matter where we set up the feeder, they find their way in and eat nearly all of the seeds before the birds can get any. I only have slightly more patience with them than Anthony does because they're still so cute. 

ezgif.com-video-to-gif (6).gif

Then we have the deer, who we believe may be the reason our broccoli plants have some big bites taken out of them. The other day they came right up behind our trailer and we watched them graze and play in the meadow.

ezgif.com-video-to-gif (1).gif
ezgif.com-video-to-gif (2).gif

Okay, that's probably enough wildlife photos for this update!

One more thing, for now I've deactivated my instagram page @wholesomelyelle. I haven't been enjoying using it since they changed it from chronological order to an algorithm-based feed, and also since I haven't been on Facebook for the past 4 years, it felt strange to still participate in a Facebook-owned platform when that's not what I had signed up for originally. I may still reactivate it in the future, but I just wanted to take a break for a while to focus on other things. 

For now that means you'll be hearing a lot more from me right here on my blog and hopefully more on Youtube as well! I'll continue to post updates on life in the Airstream and more healthy recipes will be coming your way this week so check back in for more soon!

Chickpea "Tuna" Wrap with Oil-Free Pepita Pesto [Vegan]

finaltuna.jpg

These chickpea "tuna" salad wraps with pesto sauce are the perfect meal-prep lunch recipe to keep you feeling healthy and satisfied during the work week. The best part: NO cooking is required to make either the pesto sauce or the chickpea salad! All you need is a blender for the pesto sauce and a mixing bowl and masher for the chickpeas. 

To be completely honest, I don't quite remember what tuna tastes like. I haven't had a tuna sandwich since I was a little kid, so I couldn't tell you if this actually tastes like tuna fish or just a delicious chickpea salad.

I would've just called it a chickpea salad wrap, but with the addition of some finely chopped seaweed in the mix, I feel pretty confident that these smashed chickpeas have a touch of oceanic flavor and a texture that gives off some tuna vibes. 🐟

While it might not be just like tuna, there are many reasons to try chickpeas instead and avoid eating tuna and other sea life-

  1. Mercury and other toxic heavy metals bioaccumulate up the food chain, so large fish that eat smaller fish, like tuna, often contain extremely high levels of these heavy metals as well as industrial pollutants. Even small amounts of mercury can negatively impact our digestive and nervous systems. This risk greatly outweighs any benefits we would receive from the omega 3 fatty acids in fish, so it's much safer to get your EPA/DHA lower down on the food chain, in the form of a micro algae supplement.

  2. Overfishing is destroying the oceans and the way in which tuna are captured is actually really disturbing. They are caught by net which means they have a slow and painful death and are often crushed by the weight of other tuna and sea life as they are dragged to the surface.

  3. The CDC says that 75% of all food poisoning comes from seafood. I have experienced this for myself when I once ordered vegan avocado sushi rolls from a sushi restaurant that serves fish and got the worst food poisoning of my life due to cross contamination from the fish they were preparing on the same surface.

  4. Tuna fishing kills more than just tuna. Dolphins, sea turtles, sharks, and other sea life are also often killed when they're accidentally caught in fishing nets.

  5. Farmed fish are not any better off. They often live in cramped conditions to increase profits, which puts them at a high risk for disease and parasitic infections. To keep the fish alive, fish farmers often give the fish powerful medications and antibiotics which we then ingest. These aquafarms are not even a more environmentally friendly choice. A 2-acre salmon farm produces as much waste as a town of 10,000 people.

  6. Fish DO feel pain and in many ways, such as their memory and cognitive abilities, they are just as smart as certain vertebrates and even primates. They are playful, social, and some fish even use tools. Why choose to eat them when there are other options?


This pesto sauce made with pepitas (shelled pumpkin seeds) is my new go-to pesto recipe to spread on everything. It only requires a handful of ingredients and as always I made it completely oil-free. Most of the recipes I have found use up to half a cup of oil, which is really damaging for the health of our arteries.

Even so-called "healthy" oils like extra virgin olive oil cause more damage than if we just didn't eat the oil at all. The natural oils found in the pepitas, which still retain their fiber and micronutrients, are a much healthier way to enjoy a delicious fresh pesto, full of necessary unrefined whole plant fats. 

tp4.jpg

This pesto is easy to make quickly in the blender. I find that it blends very easily in my high-speed blender, no scraping down the sides required, but a food processor should do a great job of it as well.

It's so tasty I could eat it by the spoonful!

tp2.jpg

The chickpea "tuna" salad is also super simple to make. Just throw all of the ingredients into a mixing bowl, then give it a good mash and stir until it's still a little chunky, but evenly mixed. 

tp5.jpg
tp6.jpg

Make the wrap by starting with a layer of pesto sauce, then add a handful of fresh greens, cabbage, and carrots (I forgot to add in the carrots this time), and a nice thick line of the chickpea salad. Fold in the sides of the wrap then roll it up. For extra wrap-security, roll it up again in some parchment paper and tie it with a string.

It's a great recipe to take on the go as a packed lunch for work or school. The leftover chickpea salad and pesto sauce can be stored separately in sealed containers in the fridge for 4-5 days. The leftover pesto sauce is acutally fantastic on pasta as well!

This chickpea tuna is also great on sandwiches!

This chickpea tuna is also great on sandwiches!

tp3.jpg

Vegan Pizza Soup with Bell Pepper & Mushrooms

pizzasoup1.jpg

This hearty soup has everything you love about pizza all in one bowl. The only thing missing is the crust, but if you want the full experience just serve this soup up with some fresh bread! 

When I first started making this variations of this recipe I didn't intend to call it pizza soup, but every time I'd make it my partner would tell me it tastes like pizza. I've since come to fully embrace idea of pizza flavors being in a soup and so I've tried to make it a bit more pizza-like each time which resulted in this thoroughly pizza inspired soup creation.

I chose to use classic pizza topping veggies like mushrooms and bell peppers and I also added in barley and white beans to make the soup extra filling and give it a bit more texture and substance. If you're not into barley feel free to leave it out, but it you like an extra thick soup it definitely lends itself to that consistency. 

The fresh herbs give this soup an authentic pizza flavor.  While I used dried oregano for convenience, I opted to use fresh basil and thyme as well which if you can find them fresh they really add such a good flavor. 

pizzasoupcombo.jpg

While this soup is still delicious without the parmesan topping, I find that pairs nicely with the tomato sauce and gives it such a realistic pizza flavor. Check out my Vegan Parmesan recipe for a super quick and easy way to make your own at home and enjoy the extras on all sorts of food, it's seriously so good on almost anything savory. 

cashewparm.jpg

This recipe requires a little bit of chopping, but it cooks up on the stovetop in just 30 minutes making it a perfect weeknight recipe! It's also oil-free and full of whole grains, healthy plant protein, and fiber to keep you feeling healthy and vibrant.

If you love pizza, give this soup a try and let me know what you think of it! 

pizzasoup3.jpg